Ubuntu: Install Docker
A step-by-step guide for installing Docker on Linux-based machines
What is Docker?
Let's take a quick look at what Docker is? Imagine Docker as a magic box where you put your software and everything it needs to run. This box can be easily carried to any computer, and when you open it, your software works just the way you packed it, without needing anything extra from that computer. Here are a few steps to install Docker:
Before installing Docker, please check if it is already installed
Run the following command to verify if Docker is not installed:
docker compose version
If you see the following error, you can proceed with this guide:
Command 'docker' not found, but can be installed with:
sudo snap install docker         # version 24.0.5, or
sudo apt  install podman-docker  # version 3.4.4+ds1-1ubuntu1.22.04.2
sudo apt  install docker.io      # version 24.0.7-0ubuntu2~22.04.1
See 'snap info docker' for additional versions.

1. Download Docker
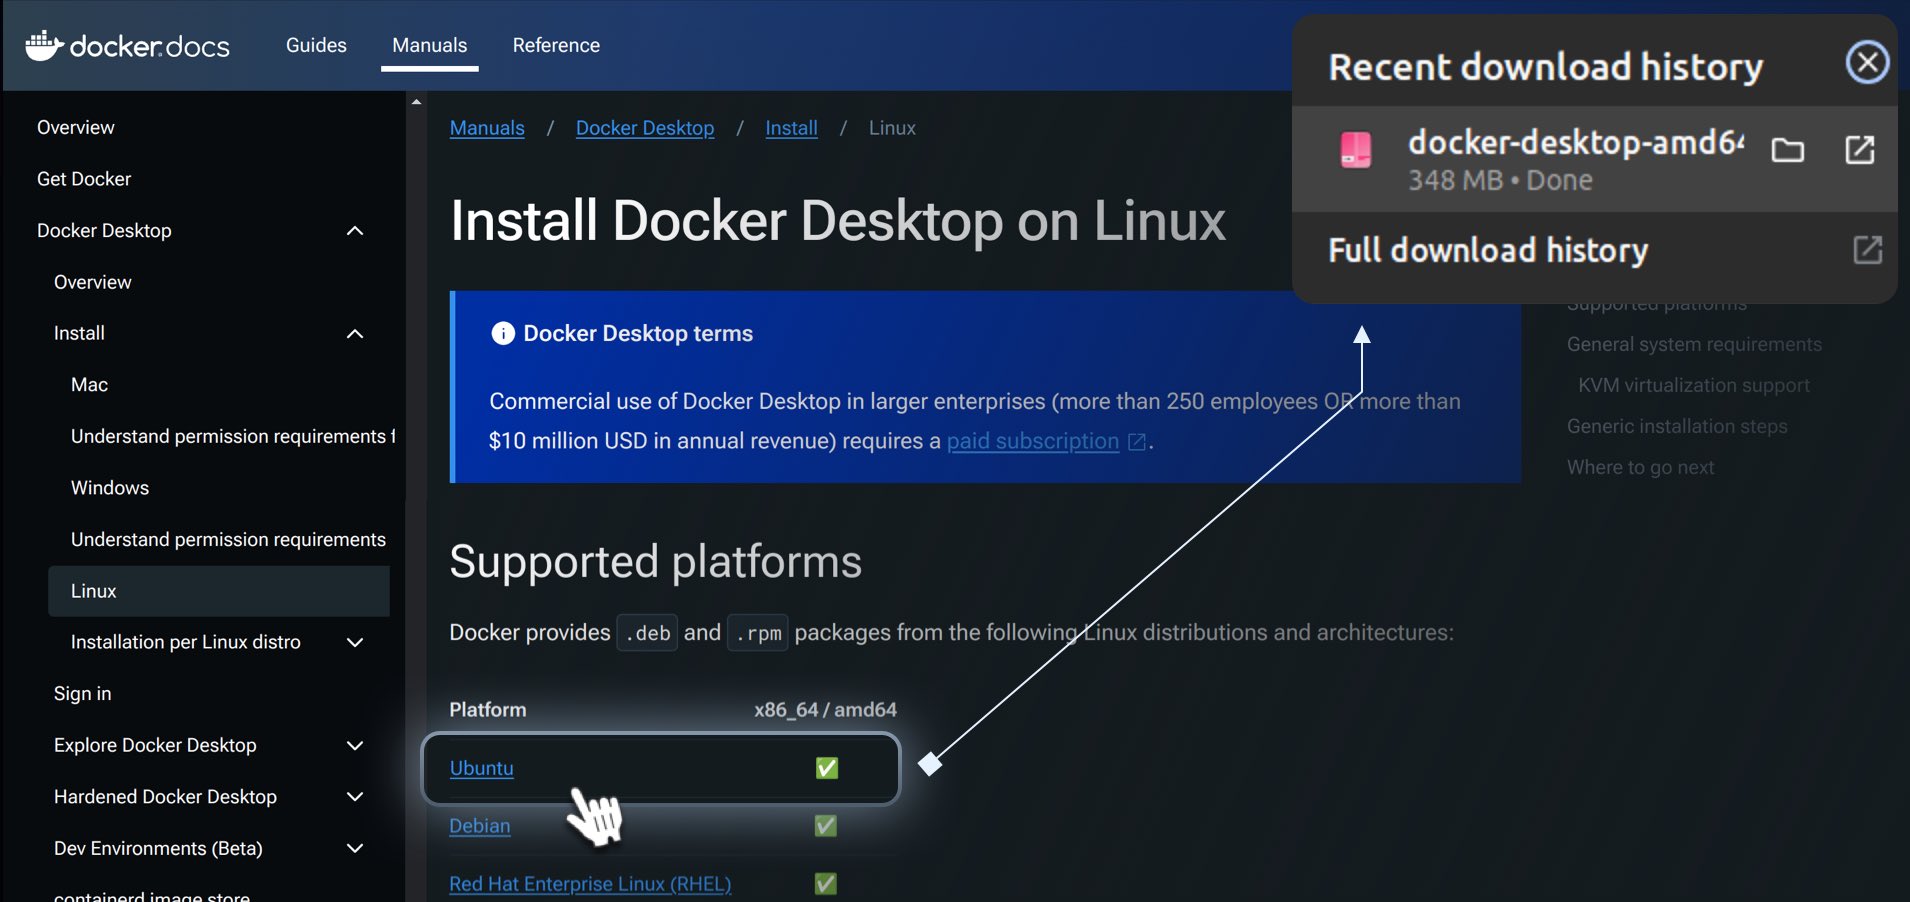
Go to the Docker website and click on "Download for Linux." You will be redirected to a page with supported Linux platforms.

2. Download the appropriate version for your system
Select the appropriate version for your system, such as Ubuntu, and click on the link in the "Supported platforms" section of the page. Downloading the Docker file may take some time. Please be patient.
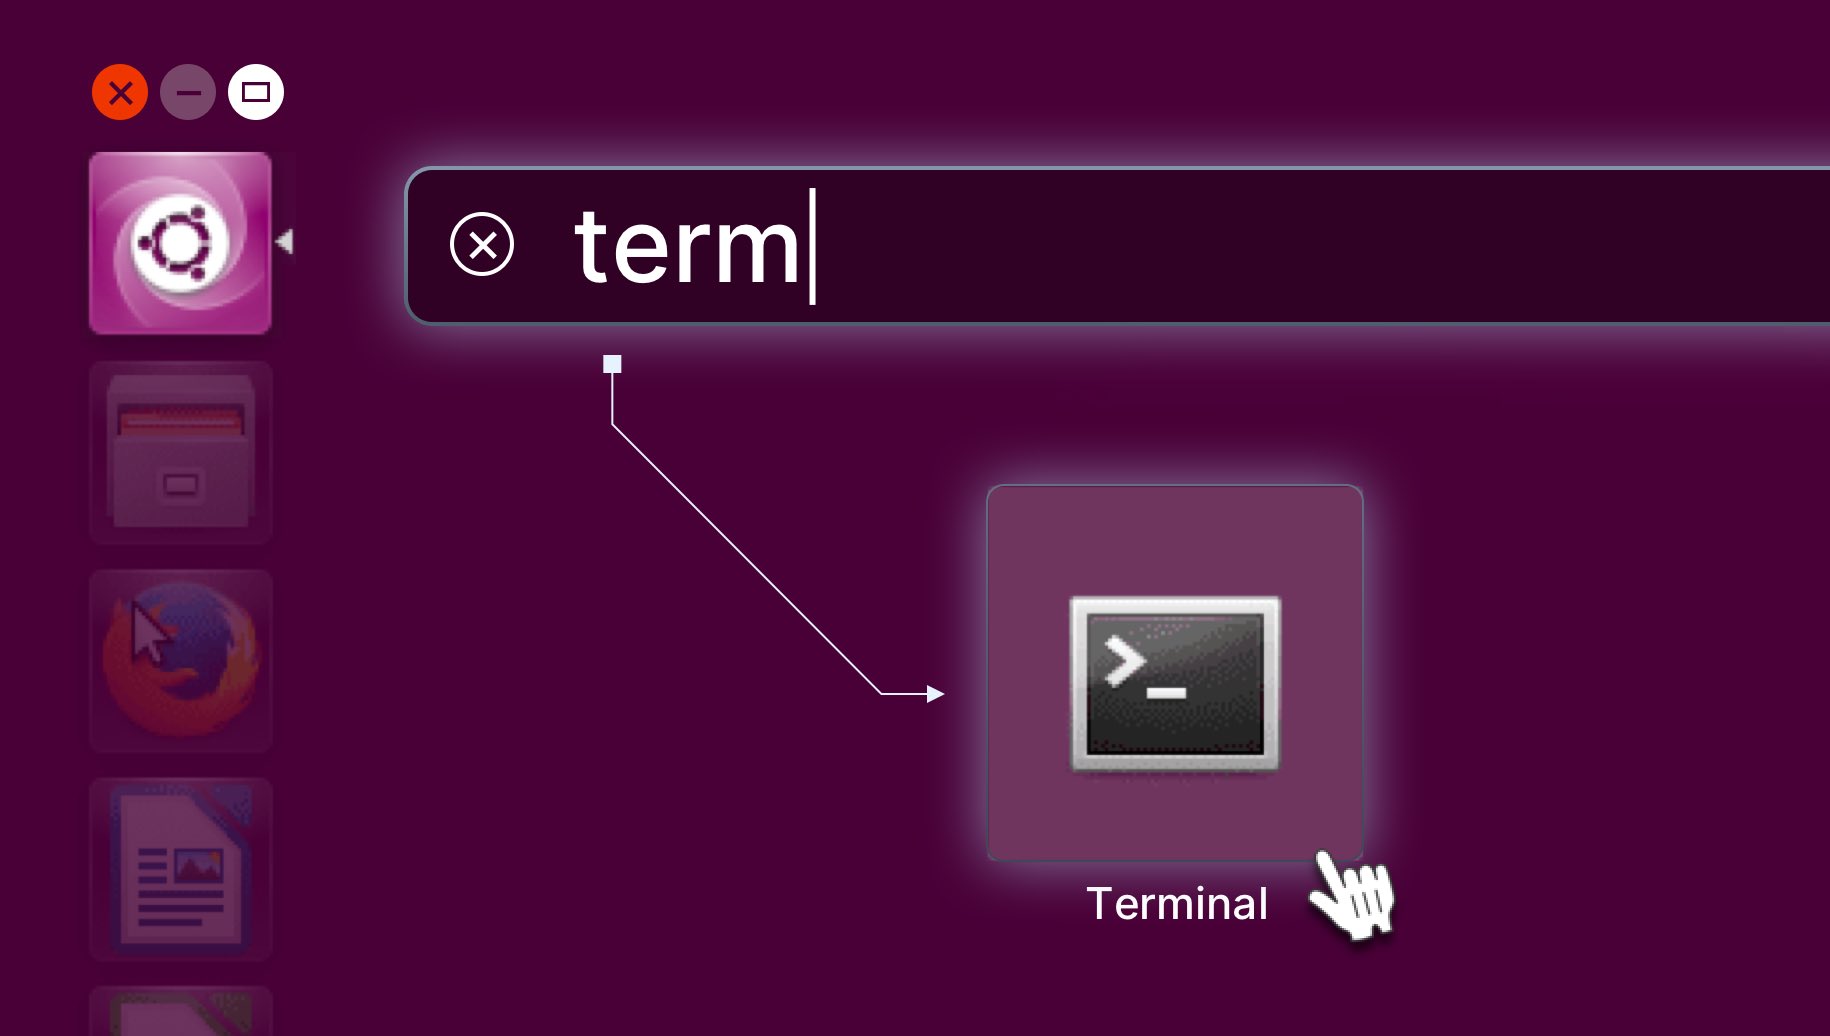
3.Open the Ubuntu Terminal through the Start Menu
Terminal is a tool on your computer that lets you type in commands to tell the computer what to do. Instead of clicking on things with a mouse, you write instructions, and the computer follows them. It's like talking directly to your computer using text.
Click the Start Menu icon, start typing "Terminal" in the search field, then click the Terminal icon:
4. Copy and run the first command
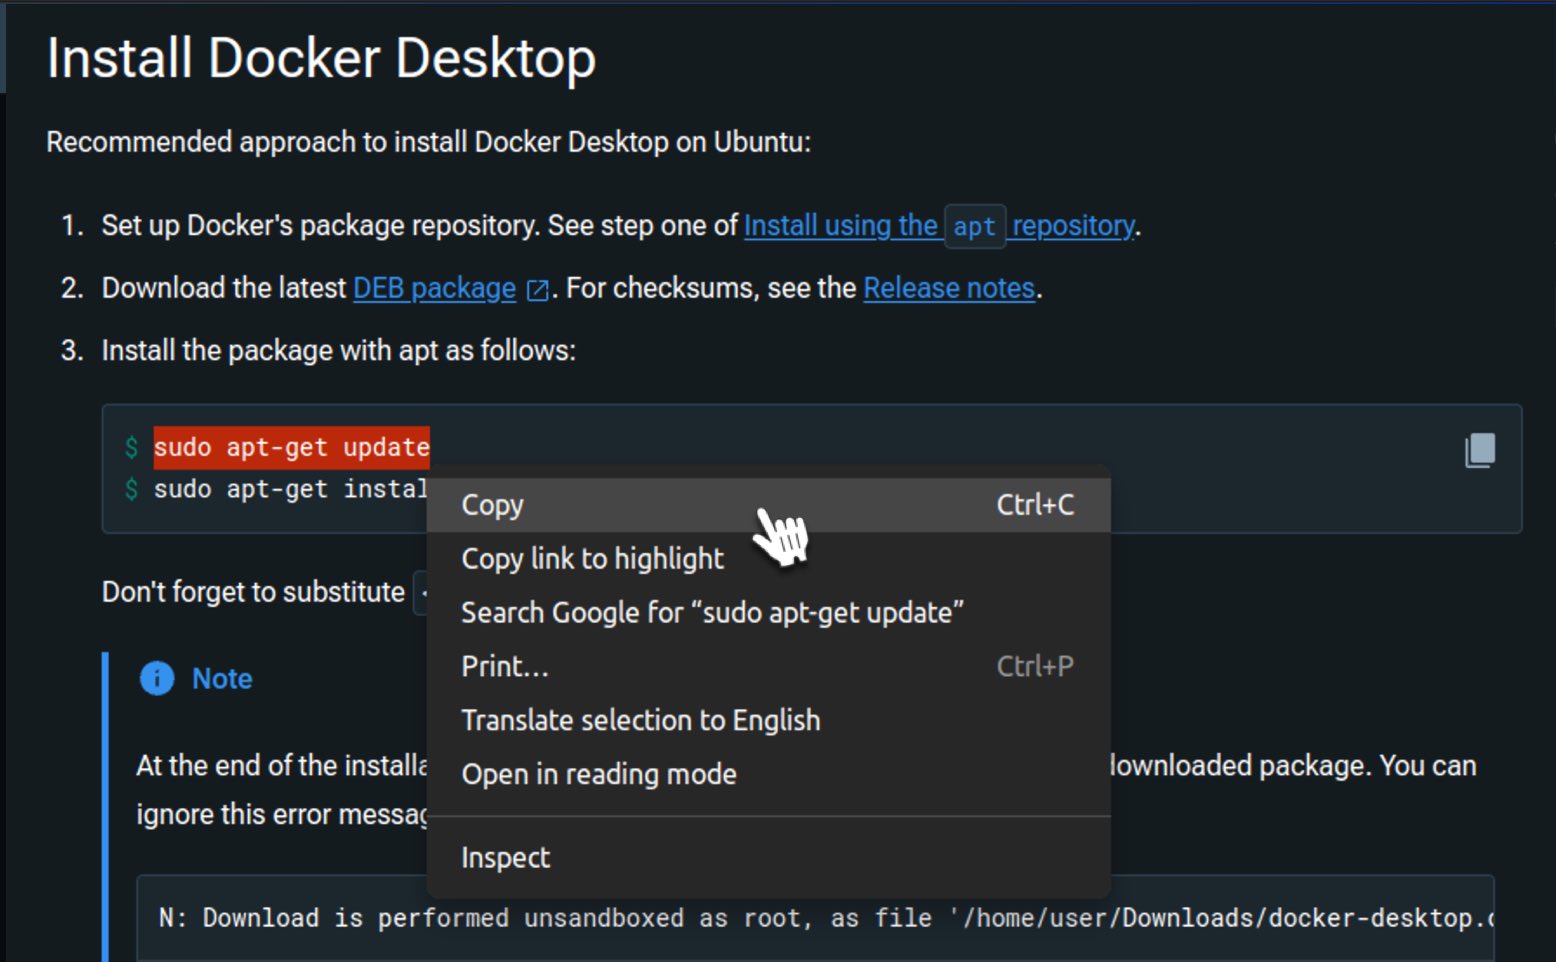
Return to the Docker page and copy the first command from the "Install Docker Desktop" section:
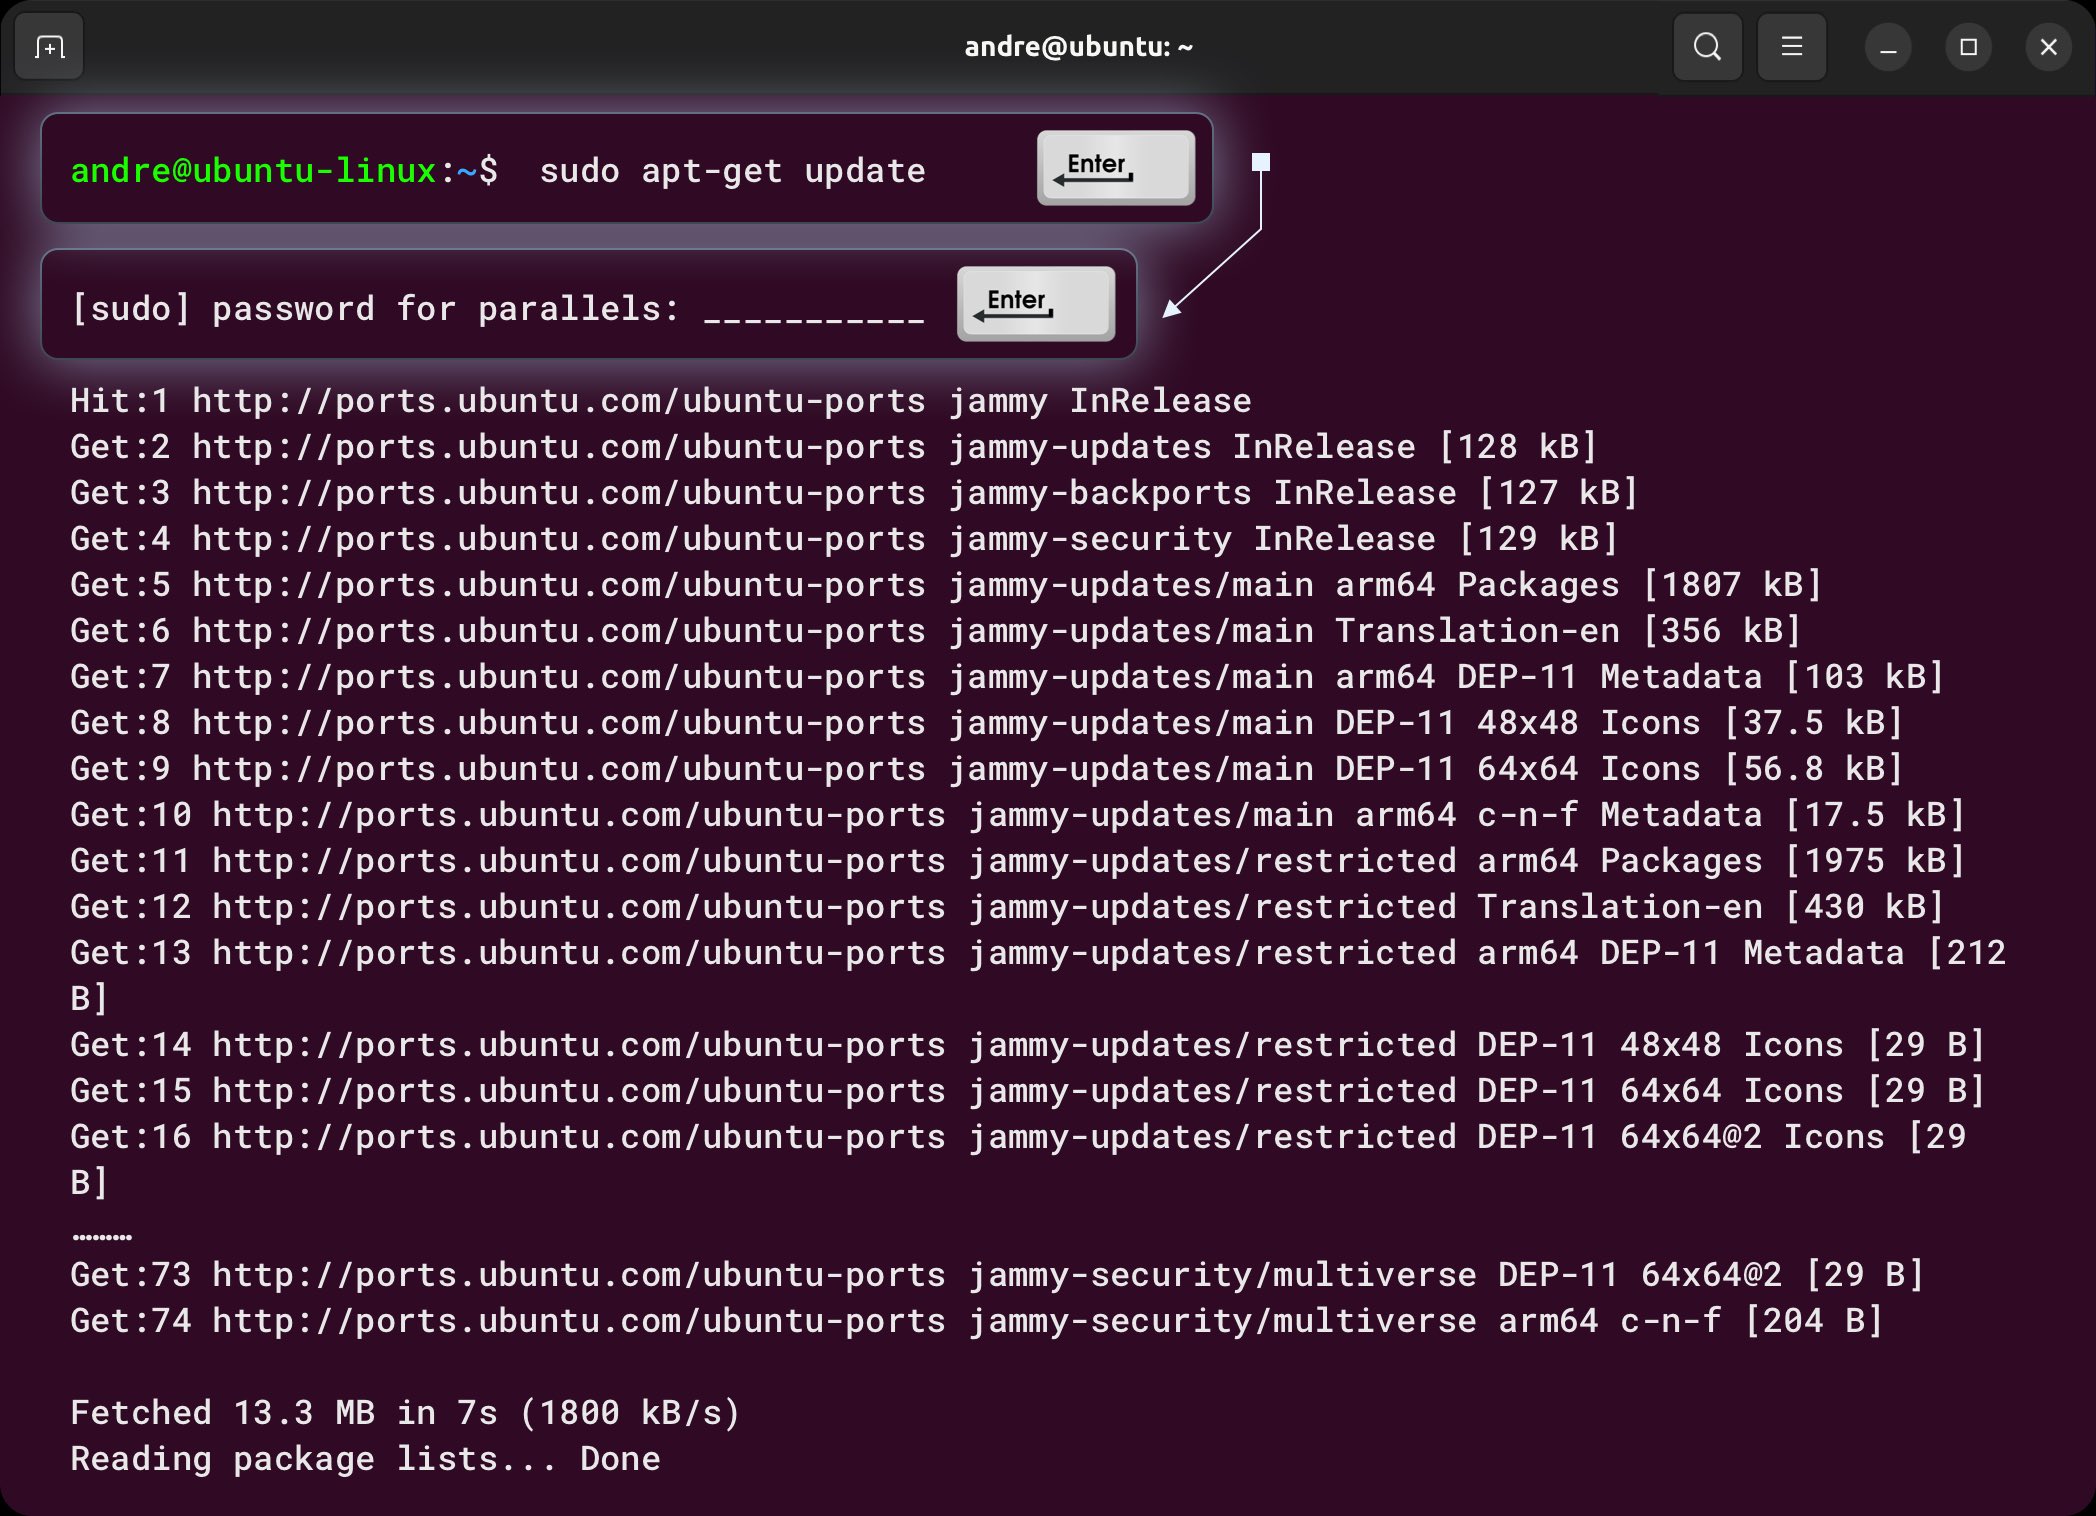
sudo apt-get update
Paste the command into the Terminal and press Enter. After that, you will be prompted to enter your password for confirmation. Type your password (note that it will not be visible while typing) and press Enter again.
5. Check the .deb package
In the Terminal, you need to check the name of the downloaded file. First, navigate to the "Downloads" folder by typing this command:
cd Downloads/
Then, enter the following command to see the list of files in the "Downloads" folder:
ls

6. Copy the installation command
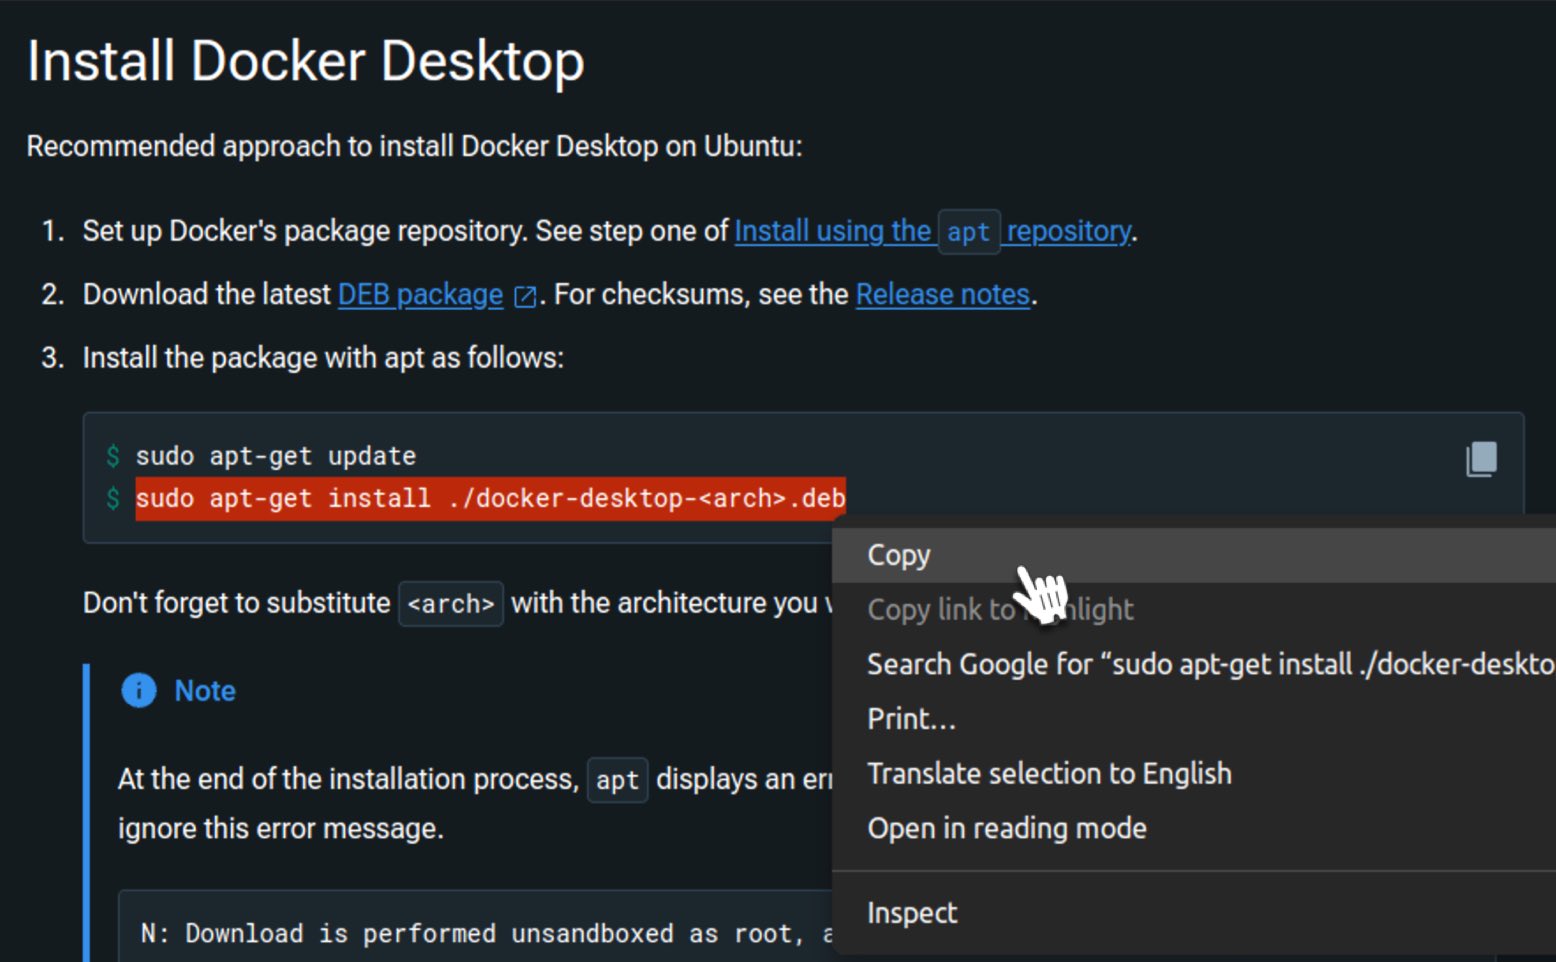
Return to the Docker installation page and copy the second command from the "Install Docker Desktop" section:
sudo apt-get install ./docker-desktop-amd64.deb
Make sure to replace the package name with the correct one from the Terminal (based on what you saw in the previous step).
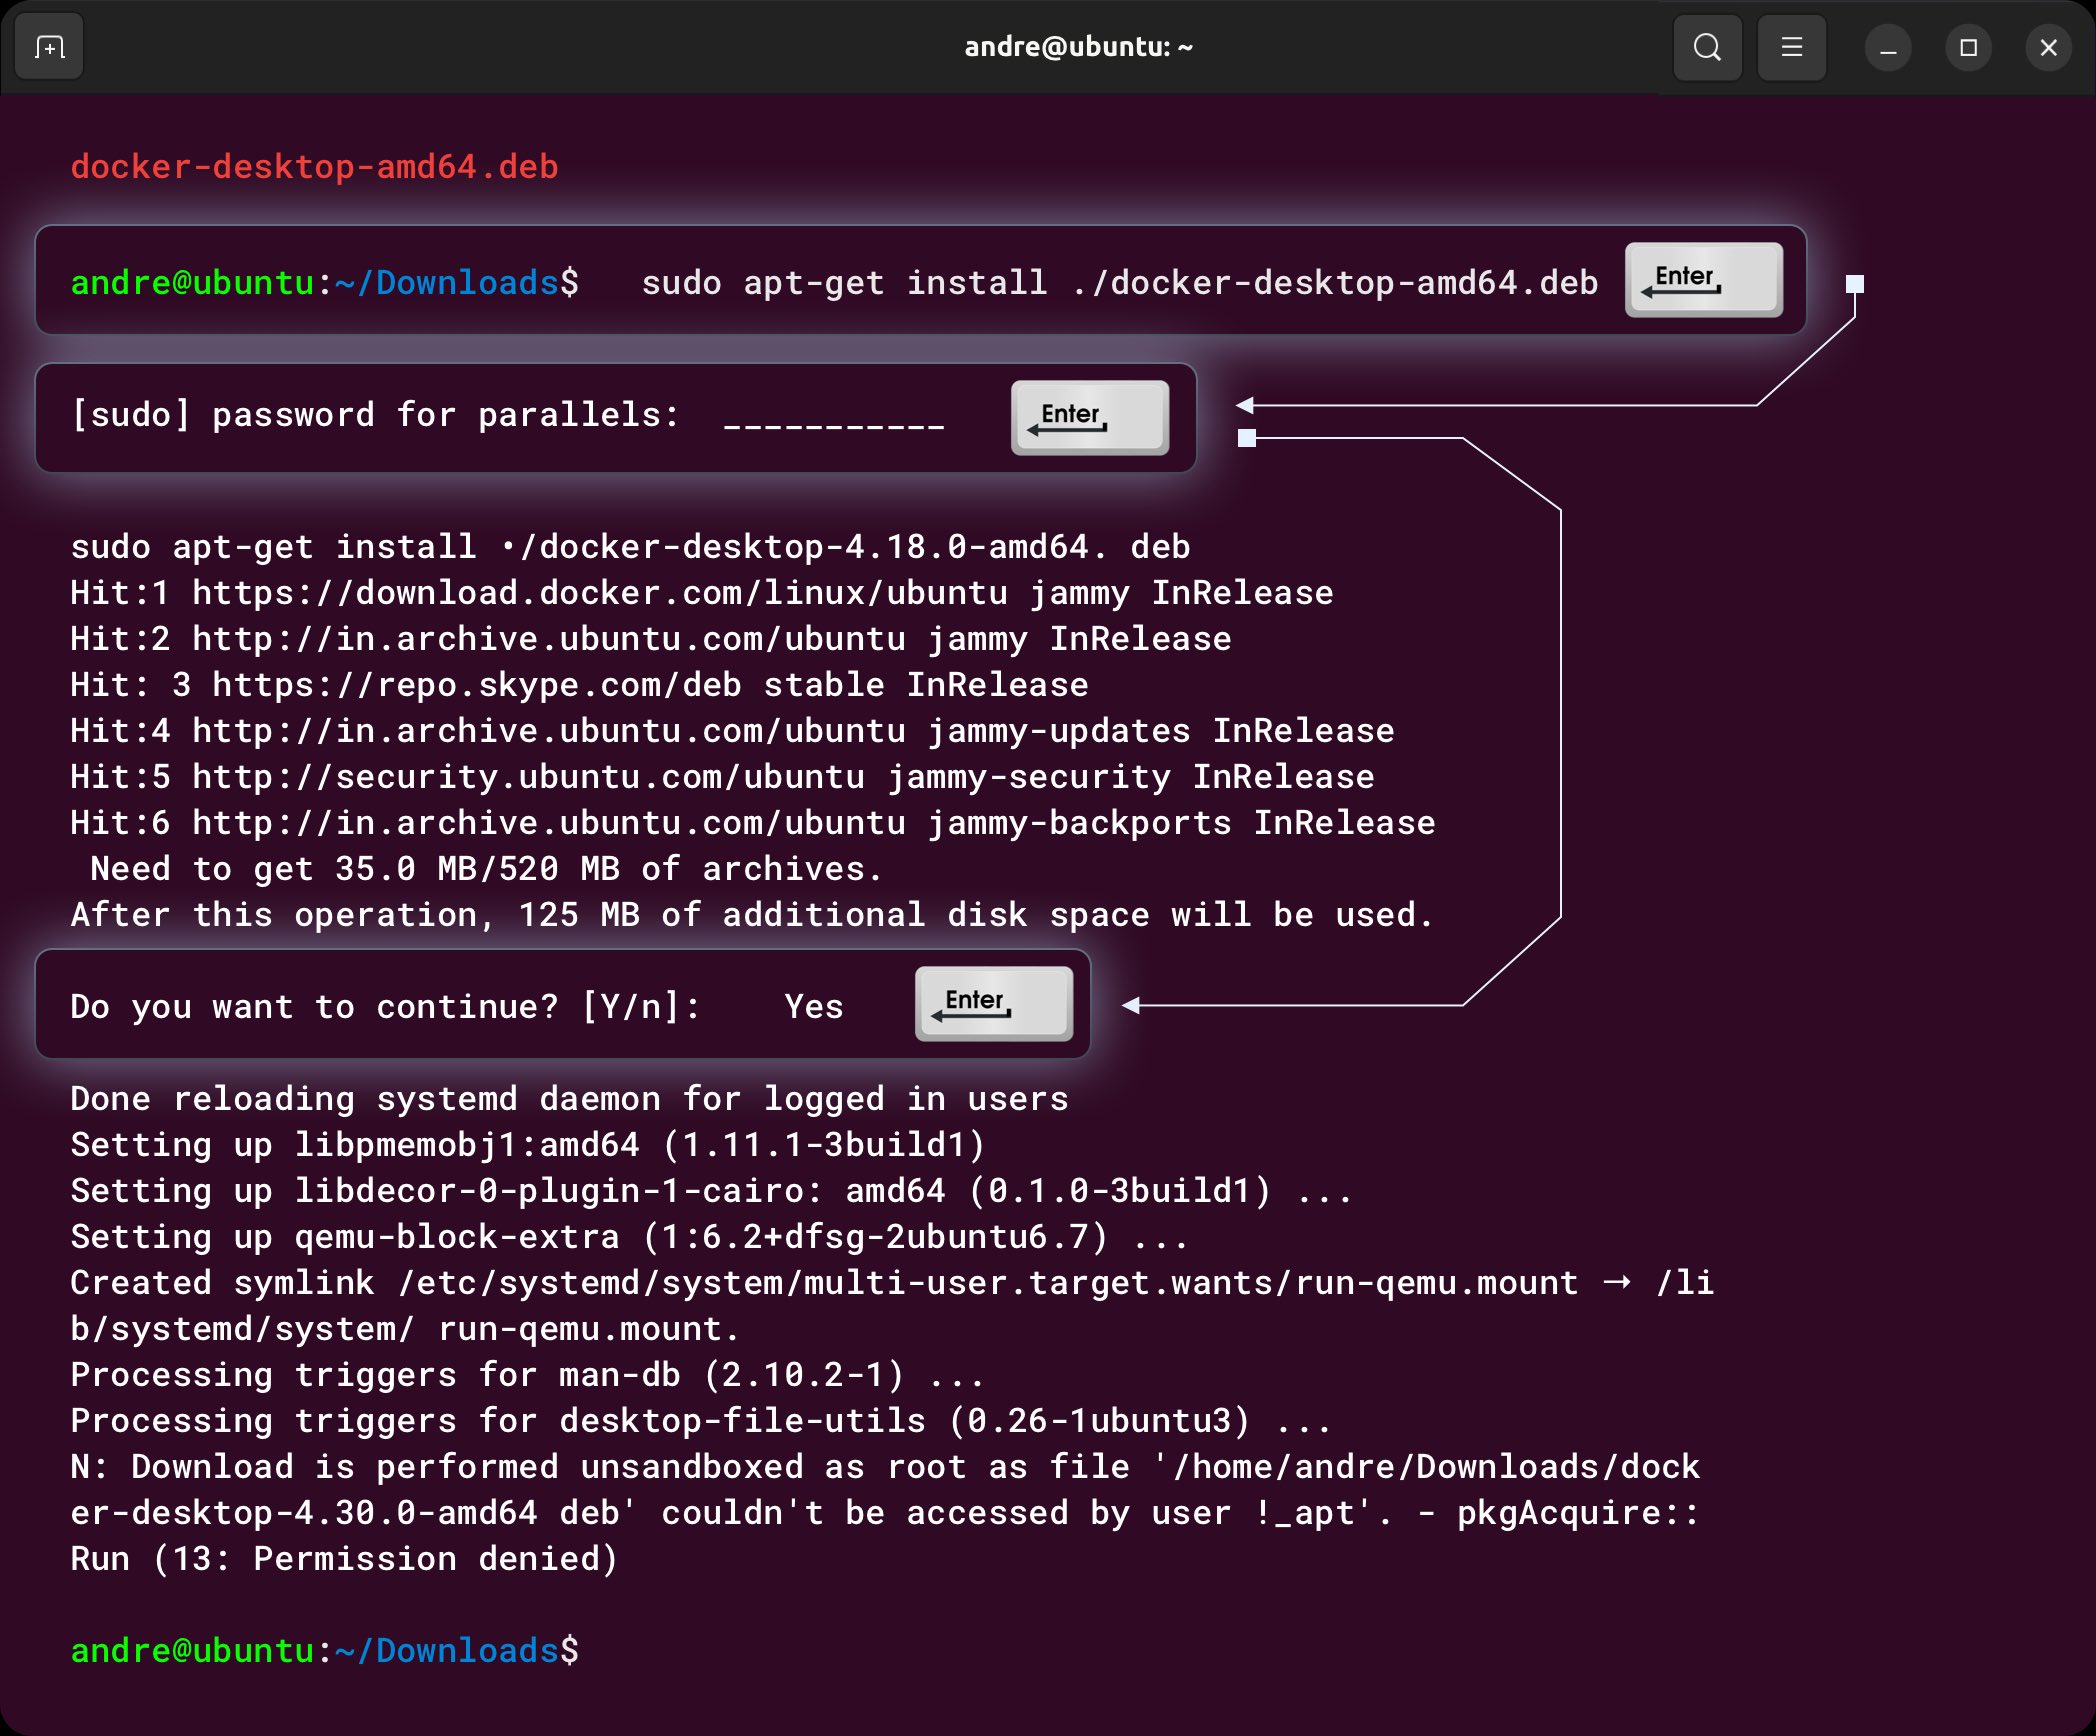
Paste the command into the Terminal and press Enter. After that, you will be prompted to enter your password for confirmation. Type your password (note that it will not be visible while typing) and press Enter again.
If you encounter an error related to the absence of Docker CE-CLI during the installation, you can follow this detailed guide: How to Install Docker CE on Ubuntu.
After completing the steps, you can continue installing Docker Desktop from where you left off.
During the installation process, you will be asked to confirm if Docker can use some space on your computer. Type Yes to complete the installation successfully..
You must restart your device after installing Docker Desktop; otherwise, the system may not allow you to use it properly, even if Docker appears to be running.
7. Run the Docker Desktop
Return to the Docker installation page and copy the command from the "Launch Docker Desktop" section:
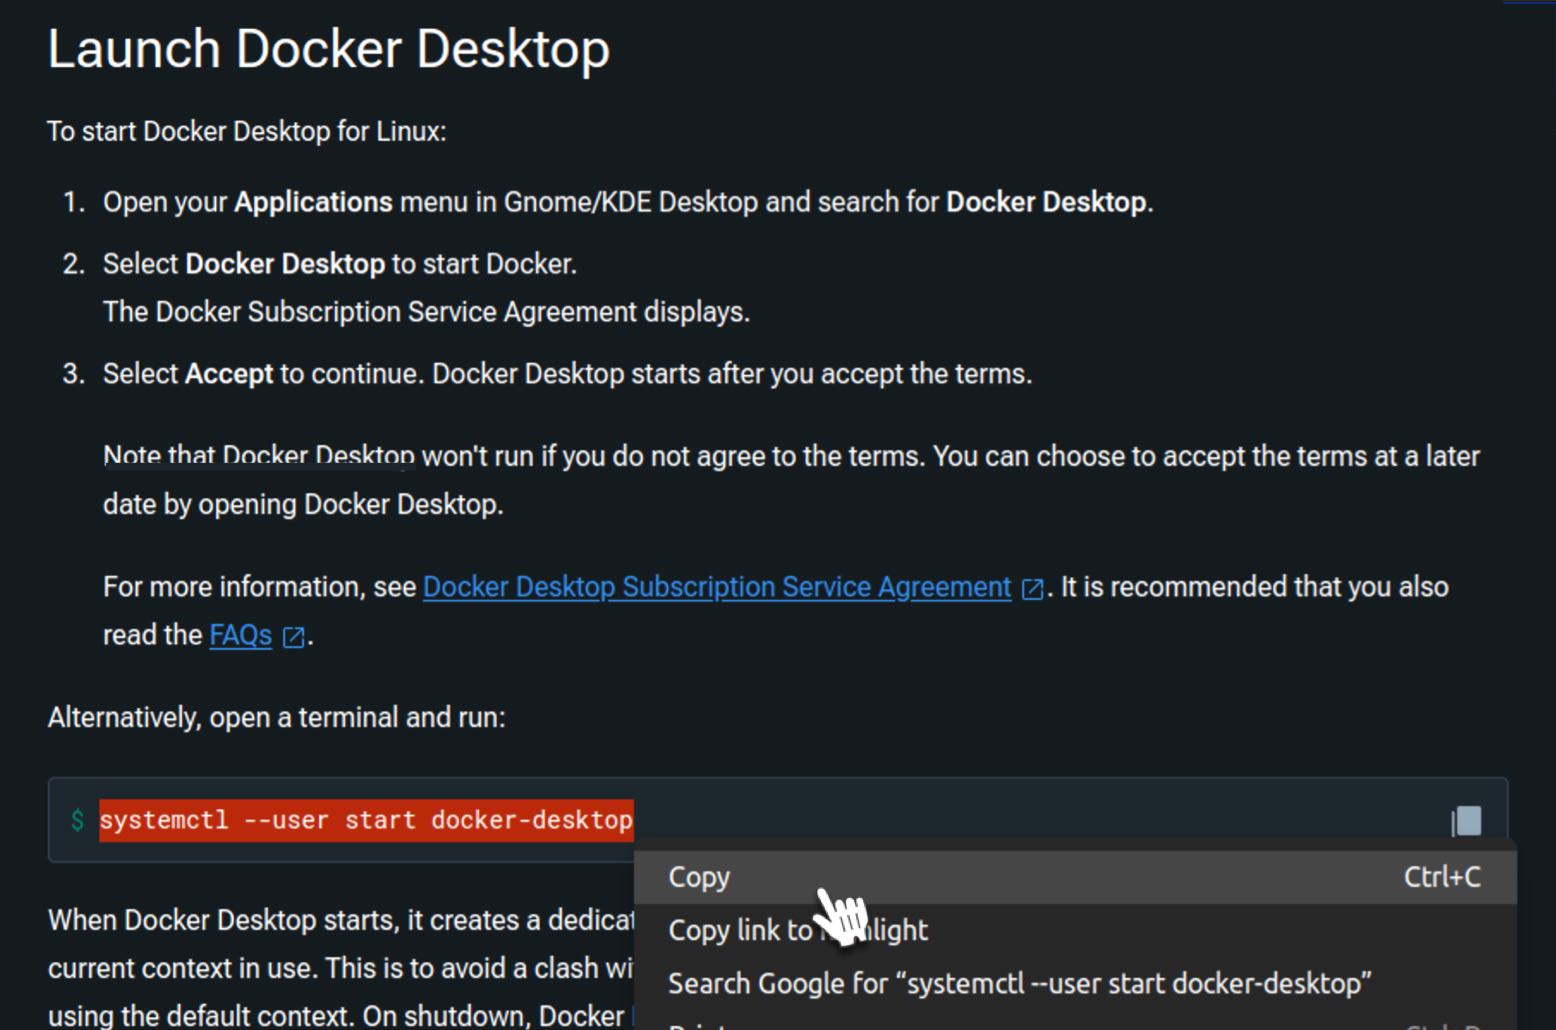
Paste the command into the Terminal and press Enter. If there are no issues with the installation, Docker should be running.

7. Verify that Docker Desktop is Successfully Installed
Copy and paste the following line into Terminal.
sudo systemctl status docker
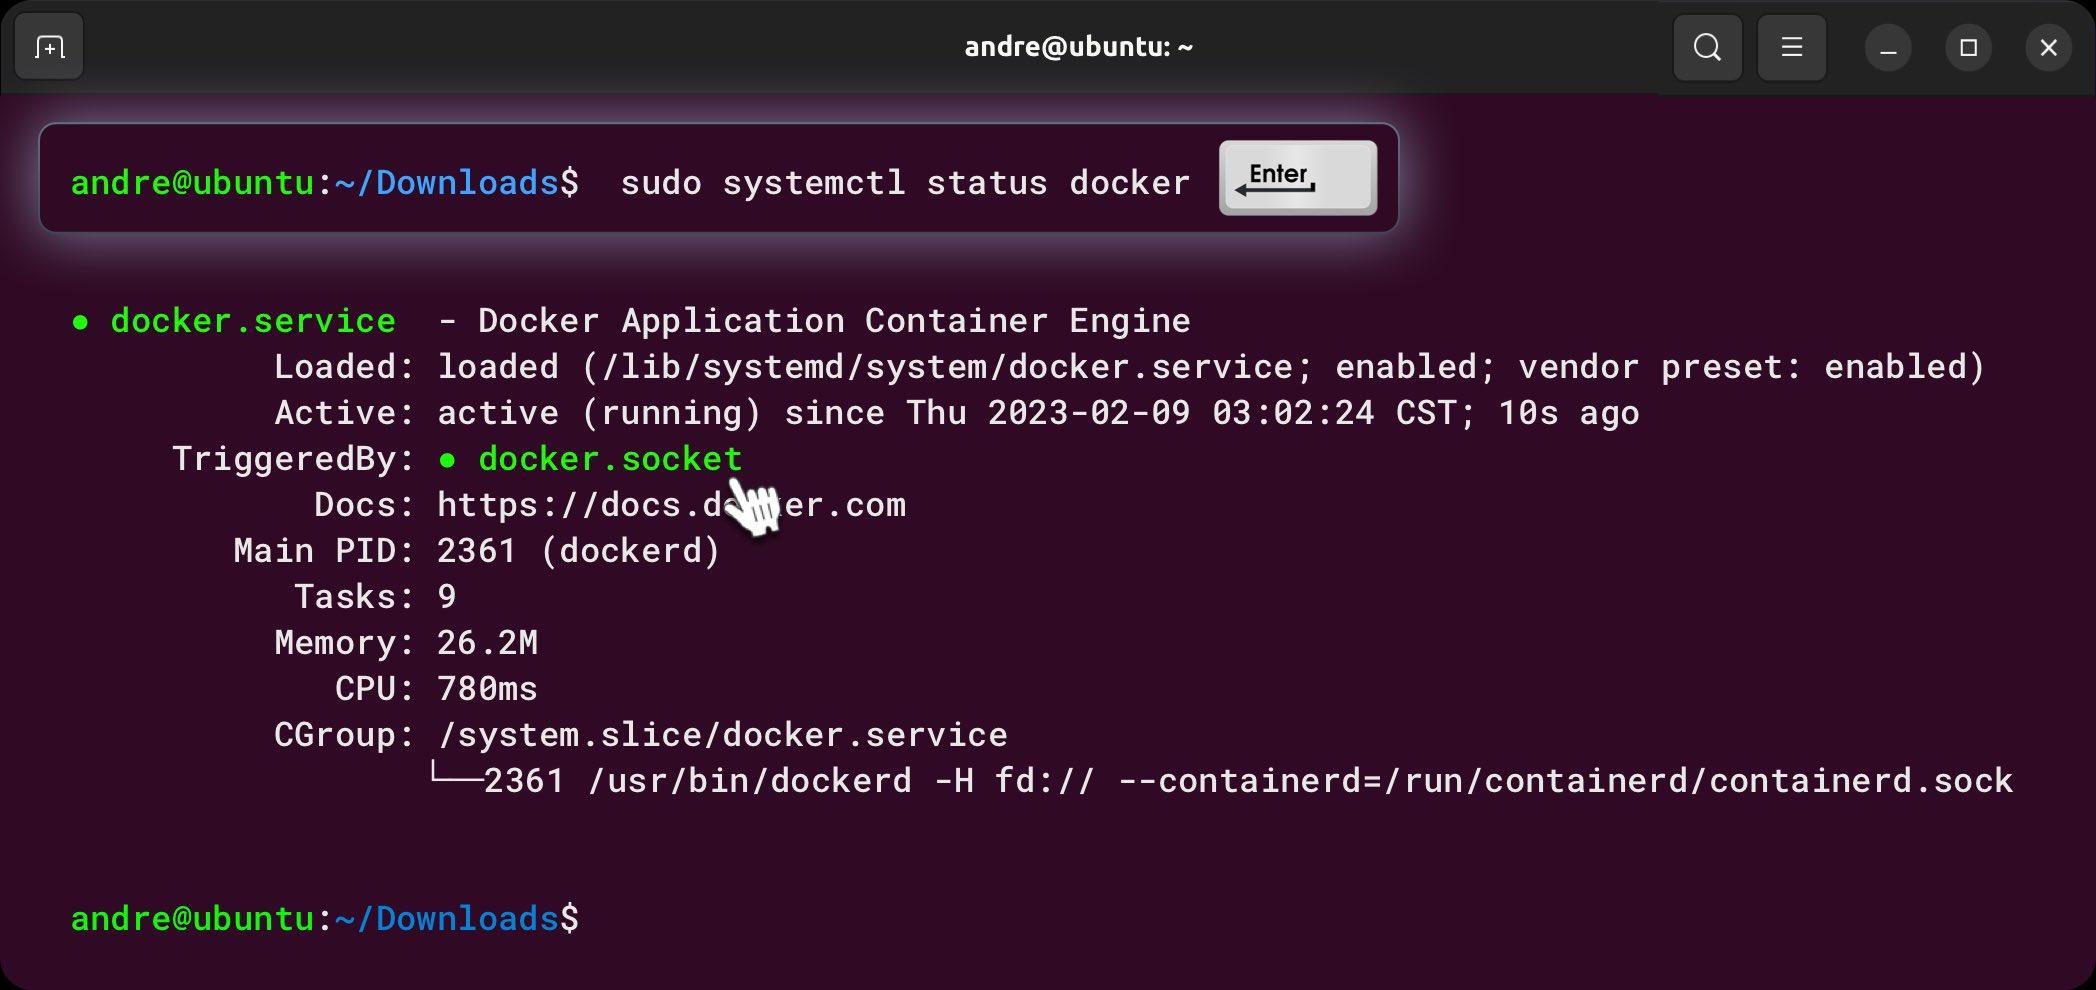
The result will be the current version of running Docker.
● docker.service  - Docker Application Container Engine
          Loaded: loaded (/lib/systemd/system/docker.service; enabled; vendor preset: enabled)
          Active: active (running) since Thu 2023-02-09 03:02:24 CST; 10s ago
     TriggeredBy: ● docker.socket
            Docs: https://docs.docker.com
        Main PID: 2361 (dockerd)
           Tasks: 9
          Memory: 26.2M
             CPU: 780ms
          CGroup: /system.slice/docker.service
                 └─2361 /usr/bin/dockerd -H fd:// --containerd=/run/containerd/containerd.sock
8. Verify Docker Installation with GPU
Confirmation Command:
- To confirm that your setup is working correctly, run:
docker run --gpus all nvidia/cuda:11.0.3-base-ubuntu18.04 nvidia-smi - The output should resemble the information displayed by
nvidia-smi. - This command verifies that Docker is correctly utilizing your GPU.
Congratulations on Successfully Setting up Docker
Now that Docker has been successfully installed and is running, you can proceed with setting up the Worker.
Troubleshoot Docker Installation
Use the Reset Script (end of page):
- If the confirmation command fails, use the reset_drivers_and_docker script:
chmod +x reset_drivers_and_docker.sh ./reset_drivers_and_docker.sh - After running the script, restart your device.
- Rerun the setup from the website. After an automatic restart, rerun the setup to complete the installation.
- If the confirmation command continues to fail, seek assistance on the community support channel.
If you encounter issues with Docker, please refer to our Troubleshooting Docker guide. If the problem persists or if you need further assistance, feel free to check our knowledge base for answers, and if you still need help, don’t hesitate to open a support ticket!
Updated 10 months ago
