
Install Nvidia Drivers
A step-by-step guide for installing Nvidia Drivers on Windows-based machines.
What are Nvidia Drivers?
NVIDIA drivers are software packages that allow your computer's operating system to communicate effectively with NVIDIA graphics cards. These drivers ensure that your GPU can perform optimally, providing support for various features such as graphical rendering, video playback, and gaming performance. Keeping your NVIDIA drivers up to date is important for maintaining system stability, compatibility with new software, and obtaining the best performance from your graphics card.
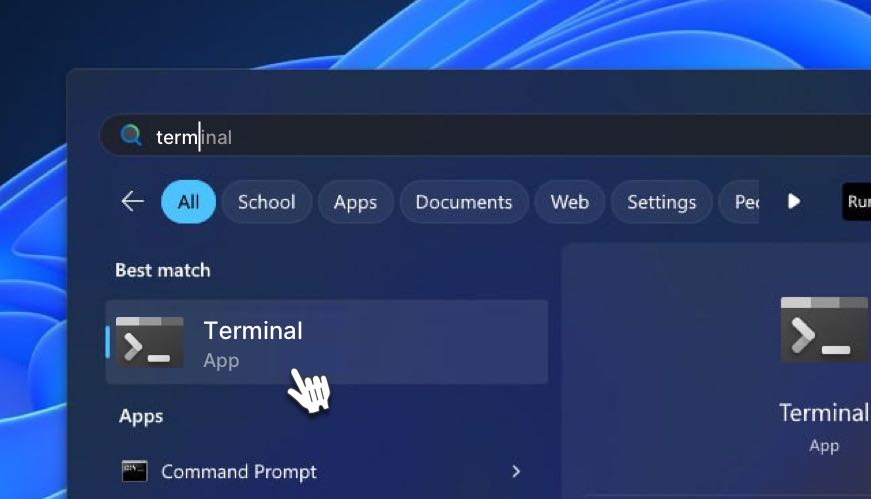
1. Open Windows Terminal From the Start Menu
Click the Start Menu icon in the popup Menu, type Terminal in the search field, then click Terminal.
2. Verify That the Correct Drivers Are Installed
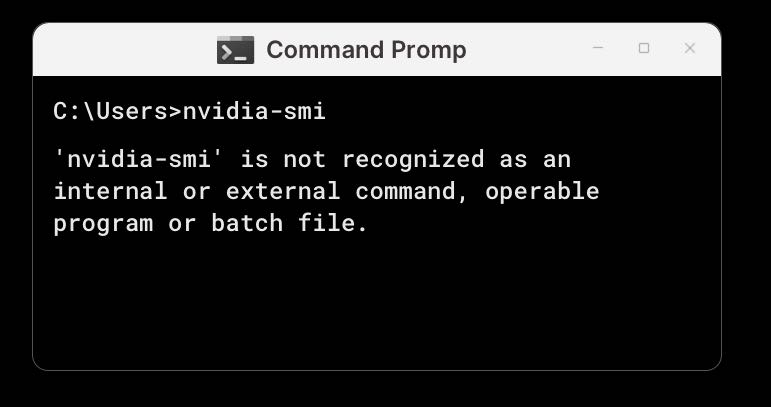
To check that you have the correct drivers, open a command line on your Windows PC (Windows key + R, type cmd) and type into it the following.
nvidia-smi
If you encounter the following error message:
C:\\Users>nvidia-smi
'nvidia-smi' is not recognized as an internal or external command,
operable program or batch file.
It means that you do not have NVIDIA drivers installed. To install them, follow the steps below:
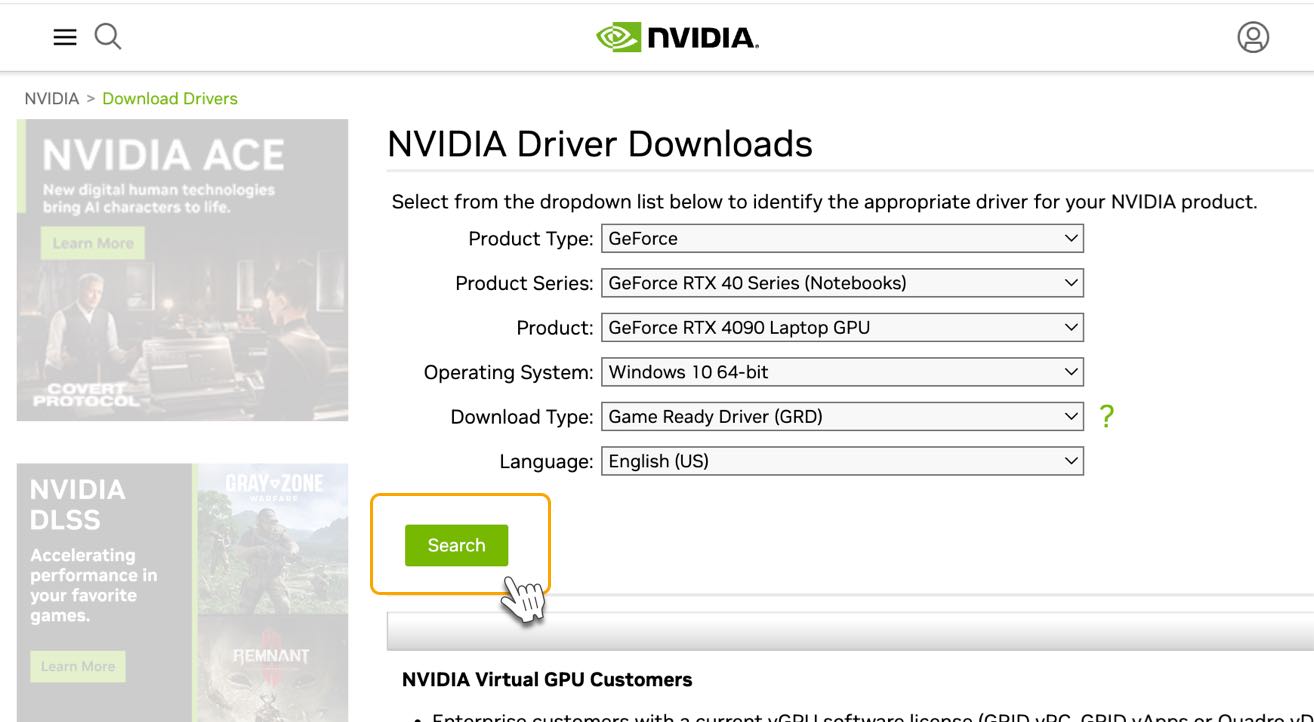
3. Go to Nvidia Driver Download Page
Choose your GPU's name, then click on search.
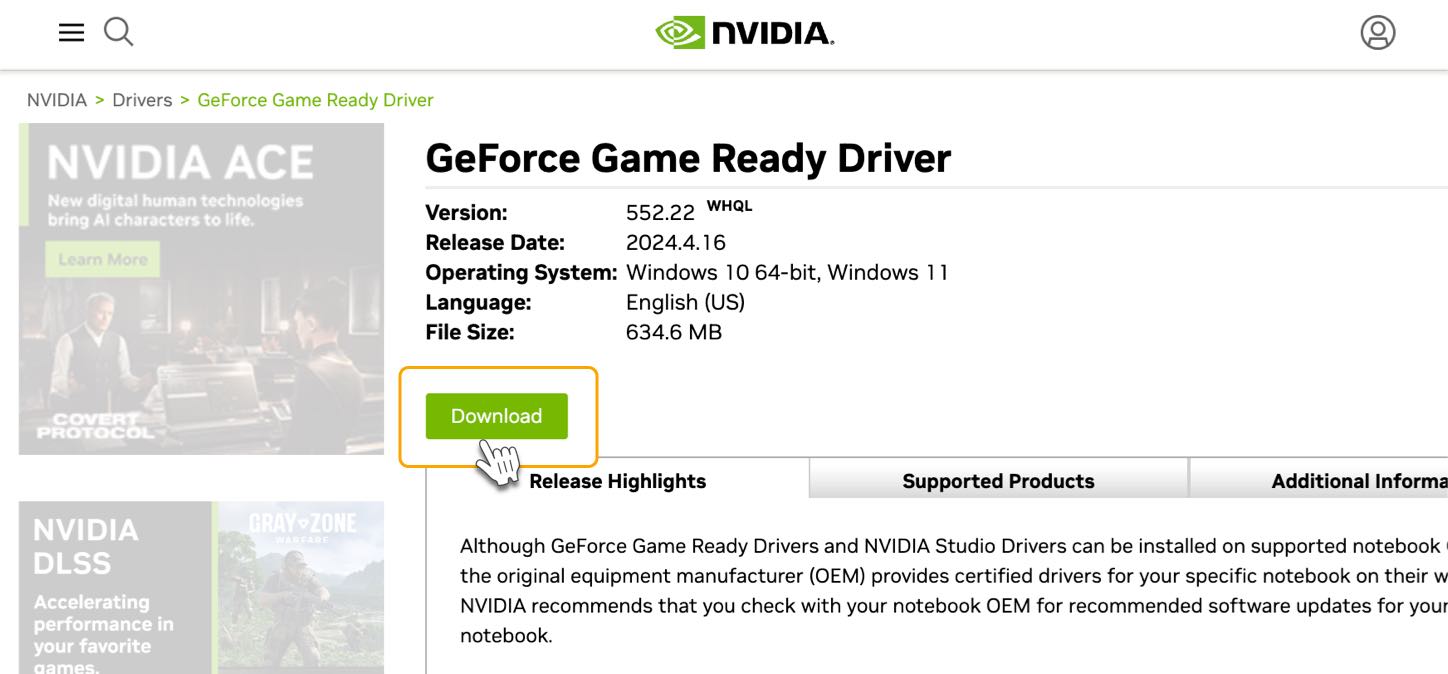
4. Download the Driver Installation File
Click the Download button for the NVIDIA driver that matches your GPU and Windows version.
Driver Version 552.44 is currently the most stable & tested driver.
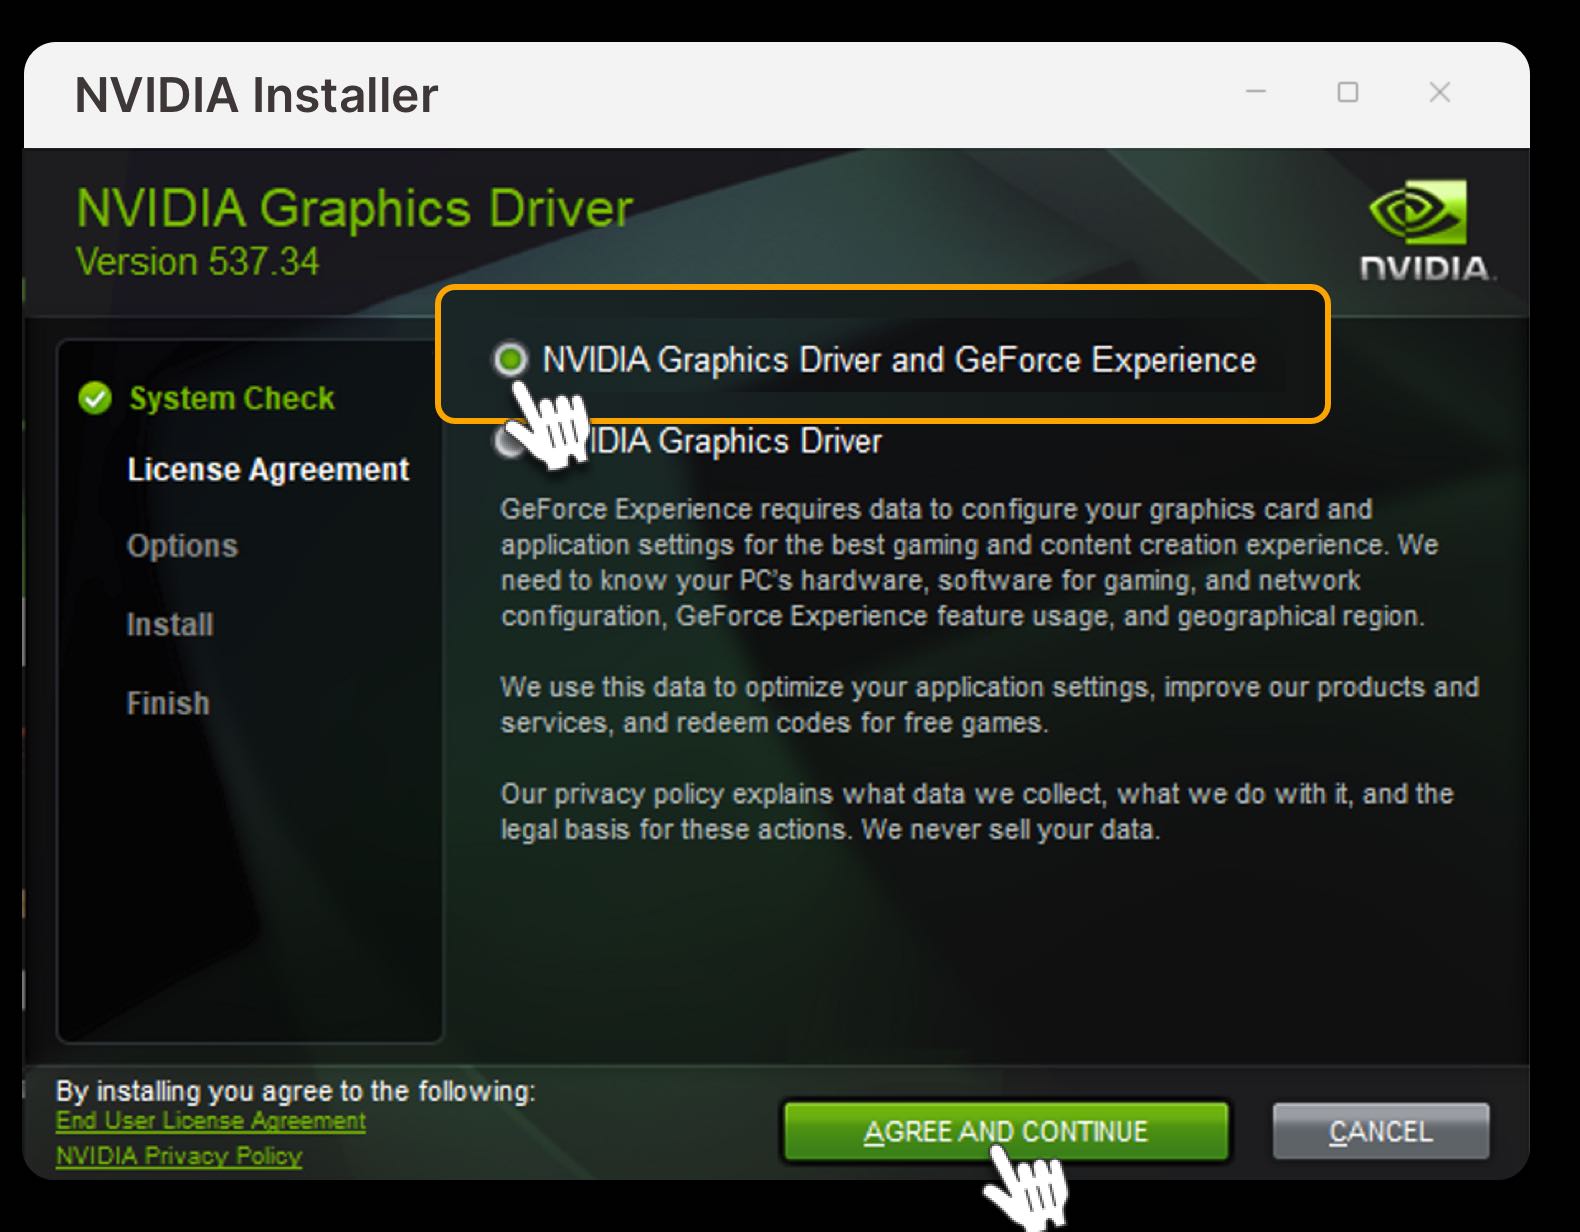
5. Open the .Exe File and Proceed With the Installation Process
Once the download is complete, start the installation, select the first option and click on "Agree and Continue."
6. Reboot your computer
After the installation is complete, it's essential to reboot your computer. Restart your machine to ensure that the new NVIDIA driver is fully integrated into your system.
7. Verify the Installation Process
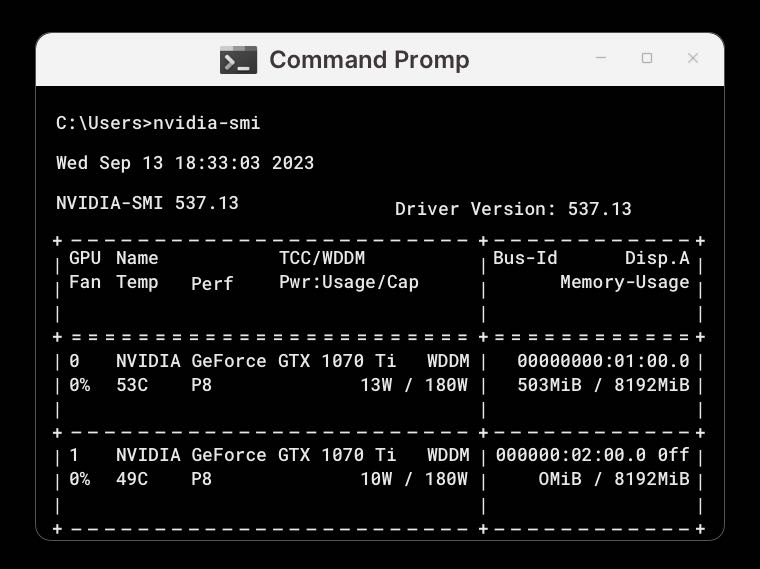
After your computer reboots, open Windows Terminal from the Start Menu and enter the following command:
nvidia-smi
You should see this outcome:
+ — — — — — — — — — — — — — — — — — — — — — — — — + — — — — — — — — — —  +
| GPU  Name         TCC/WDDM                      | Bus-Id        Disp.A |
| Fan  Temp  Perf   Pwr:Usage/Cap                 |         Memory-Usage |
|                                                 |                      |
+ = = = = = = = = = = = = = = = = = = = = = = = = + = = = = = = = = = =  +
| 0   NVIDIA GeForce GTX 1070 Ti       WDDM       |     00000000:01:00.0 |
| 0%  53C    P8                  13W / 180W       |     503МіВ / 8192MiB |
|                                                 |                      |
+ — — — — — — — — — — — — — — — — — — — — — — — — + — — — — — — — — — —  +
| 0   NVIDIA GeForce GTX 1070 Ti       WDDM       | 00000000:02:00.0 0ff |
| 0%  49C    P8                  10W / 180W       |       OMiB / 8192MiB |
|                                                 |                      |
+ — — — — — — — — — — — — — — — — — — — — — — — — + — — — — — — — — — —  +
That’s It. You Have the Nvidia Drivers Installed and Ready.
Now that CUDA Toolkit has been successfully installed and is running, you can proceed with setting up the Worker.
Feel free to check our knowledge base for answers, and if you still need help, don’t hesitate to open a support ticket!
Updated about 1 year ago