
Deploy VM on Demand
Your ML Workflow, One Click Away - Fast, Frictionless VM Infrastructure.
VM on Demand - the easiest way to spin up fully-equipped virtual machines tailored for AI and ML workloads. Whether you're a data scientist, researcher, or solo builder, you can now launch GPU or CPU-powered VMs with pre-installed frameworks like PyTorch, and CUDA - no DevOps required.
With just a few clicks, you'll go from zero to a ready-to-code environment, without the usual cloud complexity. Here's how to get started:
Configure Your Cluster
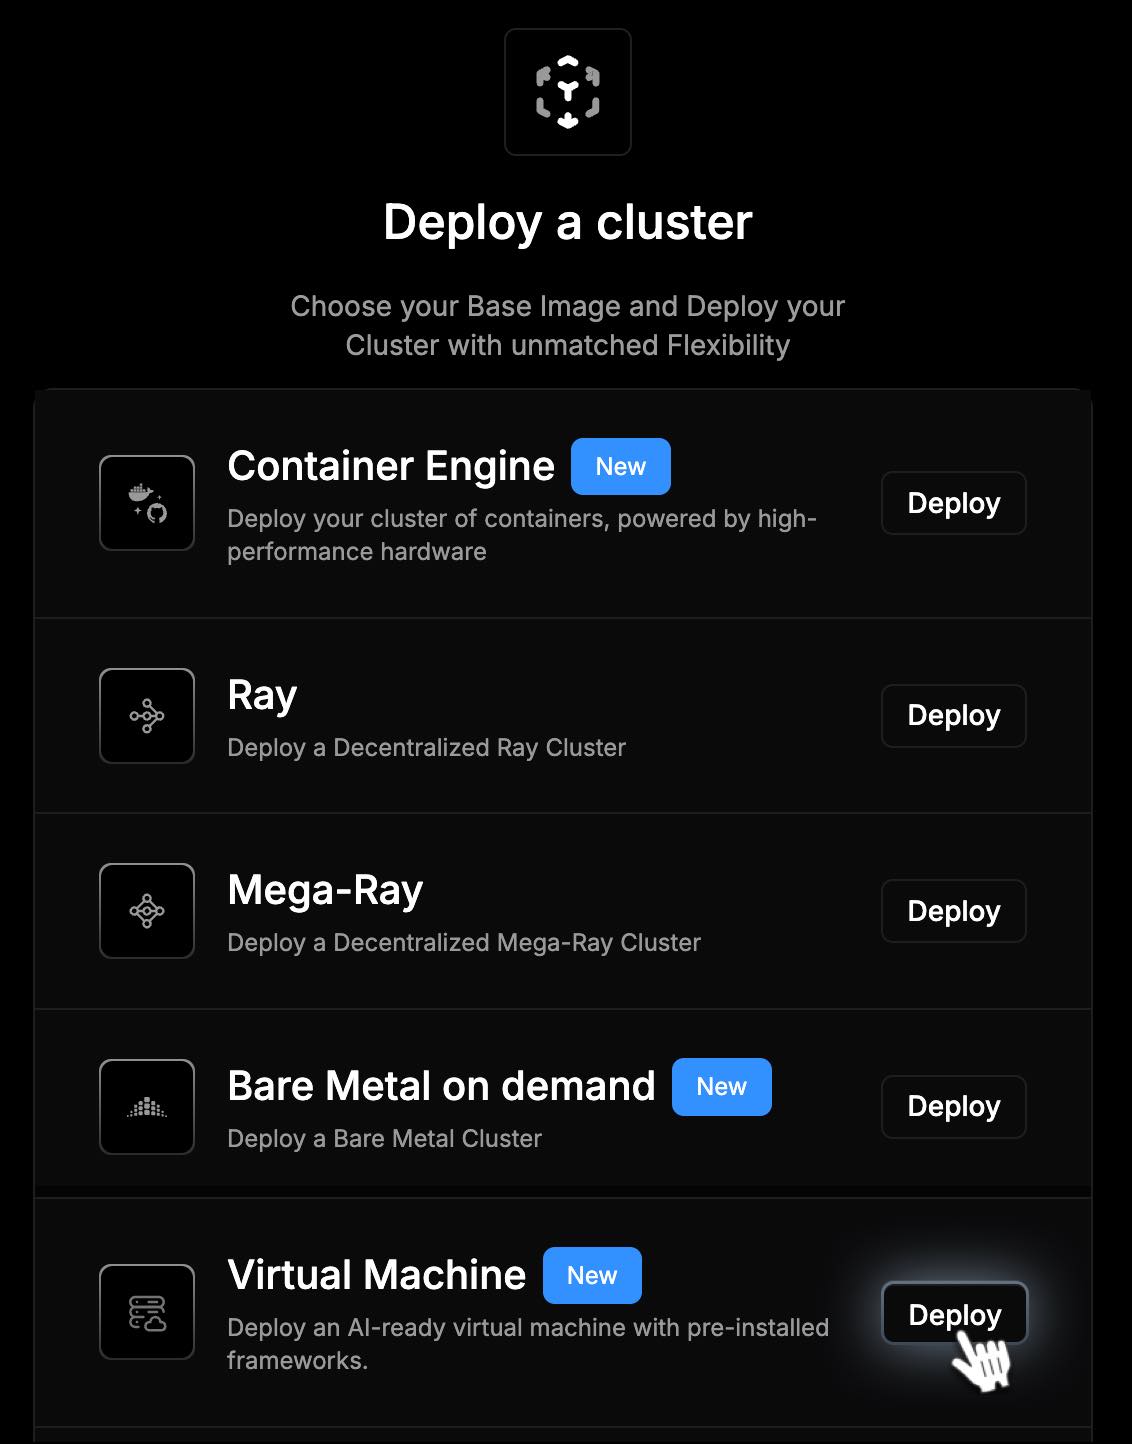
1. Create Your Cluster
Start by selecting Virtual Machine from the cluster creation menu. This is your entry point to a customizable and dedicated compute environment.
2. Select a Connectivity Tier
Your data transfer needs matter. Choose the right network bandwidth:
- Ultra High Speed - Perfect for model training, large datasets
- High Speed - Great for collaboration, notebooks, APIs
- Medium Speed - Works well for typical AI/ML dev cycles
- Low Speed - Best for testing, learning, or budget-focused work

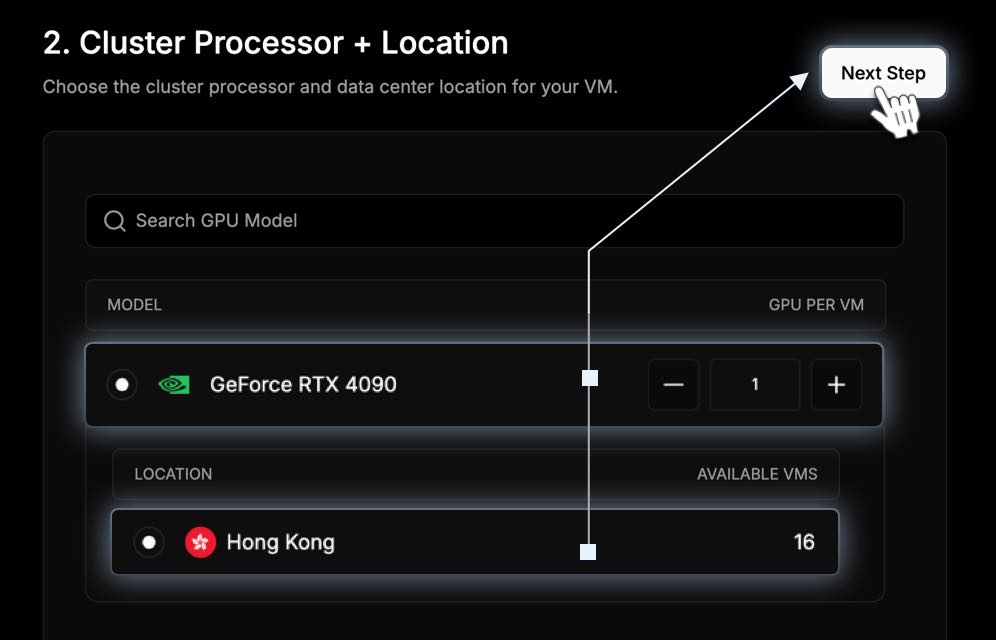
3. Processor + Data Center Location
Pick the physical location where your VM will live. Closer regions = lower latency.
- Choose a Processor Type (e.g., A100, EPYC)
- Then, select your preferred Location from the available regions (e.g., US-East, EU-West, Asia-Pacific)
Deploying closer to your users or team means faster response times.
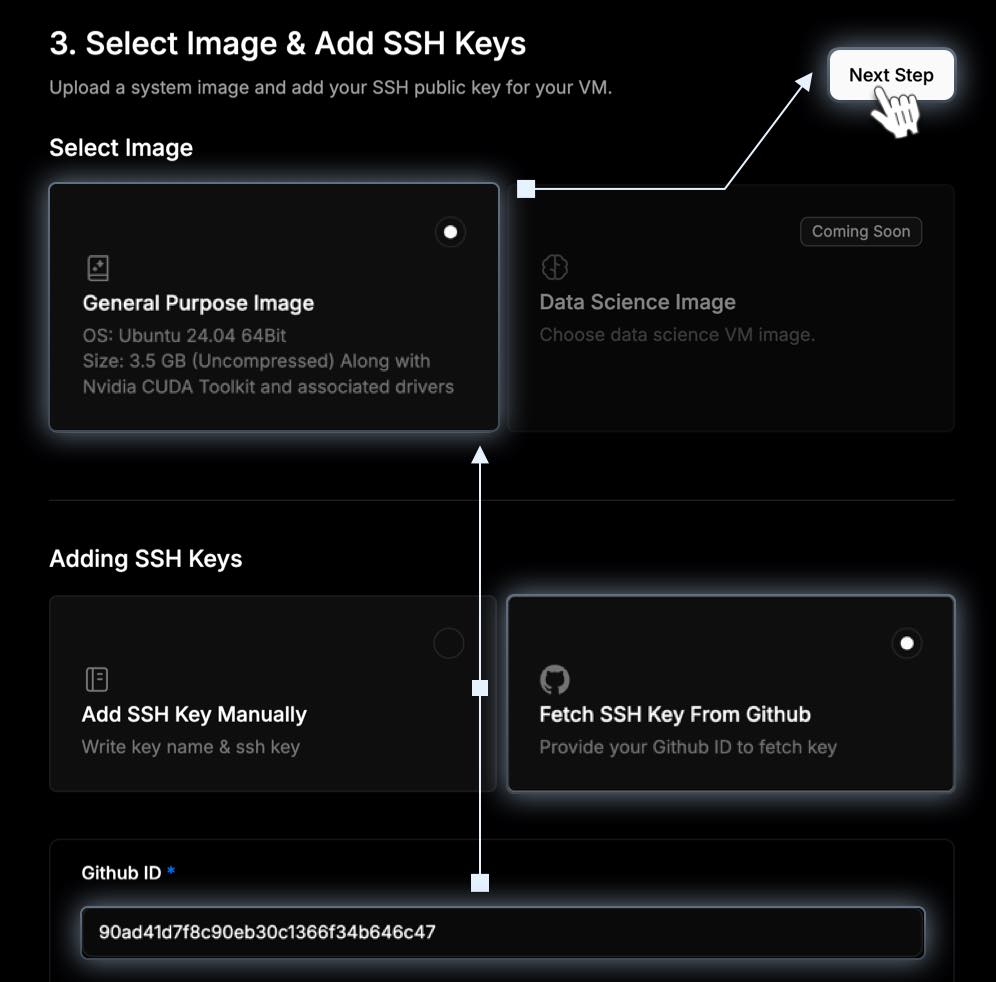
4. Select Image & Add SSH Keys
Choose Your VM Image:
— General Purpose Image
Ubuntu 24.04 64-bit, 3.5GB – includes CUDA Toolkit and drivers. Ideal for running your own stack from scratch.
— Data Science Image (Coming Soon)
The Data Science Image comes preloaded with a powerful GPU-accelerated environment for AI, machine learning, and analytics tasks. It includes:
- OS: Ubuntu 24.04.2 LTS
- Python: 3.12
- Conda: 25.7.0
- CUDA: 12.1
- RAPIDS: 25.6.0
This image is ideal for:
- Building and training machine learning models
- Exploring large datasets with GPU acceleration
- Running distributed computing tasks using Ray
- Developing and testing AI workflows in Jupyter
Important: Using Environment Variables in Entrypoints
To avoid deployment failures:
- Always define environment variables in the
env_variablessection instead of substituting them directly in theentrypointorargs.- If you reference variables in the entrypoint, escape
$as$$so the container interprets them correctly.Example:
"entrypoint": [
  "sh", "-c", "echo 'Variable value: $${TEST_VAR}' && sleep 3600"
],
"env_variables": {
  "TEST_VAR": "This is a test"
}
- Correct:
$${TEST_VAR}inside the container prints the variable value.- Incorrect:
$TEST_VARmay fail during deployment.- Avoid passing variables via
argsor directly in the command; useenv_variablesinstead.
Note for advanced users:
There is a known issue where Terraform variable interpolation (
$) can clash with environment variable substitution at the service layer. Escaping with$$prevents this conflict.
Add Your SSH Key:
Choose one of two ways to securely access your VM:
-
Manual Input
Add a key name and your public SSH key.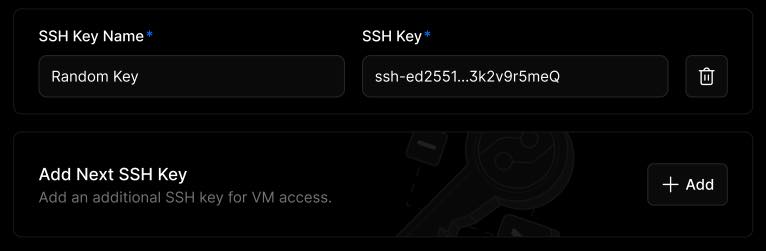
-
Fetch from GitHub
Just enter your GitHub ID - we’ll pull your public key for you.
5. Add Network Services (Optional)
SSH is added by default. Want to expose other ports or services, here is how:
- Click “Add First Network Service”, and enter: Name, Port, Protocol (TCP/UDP), Whitelist IPs (who’s allowed in)
- Click "Plus" button to apply. This gives you control over custom APIs, inference endpoints, or webhooks.

Port Exposure on io.net
When deploying containers, users need to expose ports in two places:
- Docker inside the VM
Specify the ports to expose when running the container:docker run -d -p 8082:8082 your-image-name - io.net Network / Frontend Configuration
After VM deployment, the platform will provide external ports that map to your container ports. Users need to use these ports to access the services externally.
Note:
Local Docker port configuration is not automatically propagated to the external network. Both steps are necessary to make your services accessible from outside the VM.
Important
Network services (including port exposure) cannot be modified after the cluster is created.
Make sure to specify all required ports during cluster creation in the frontend, and also expose them in your Docker run command inside the VM.
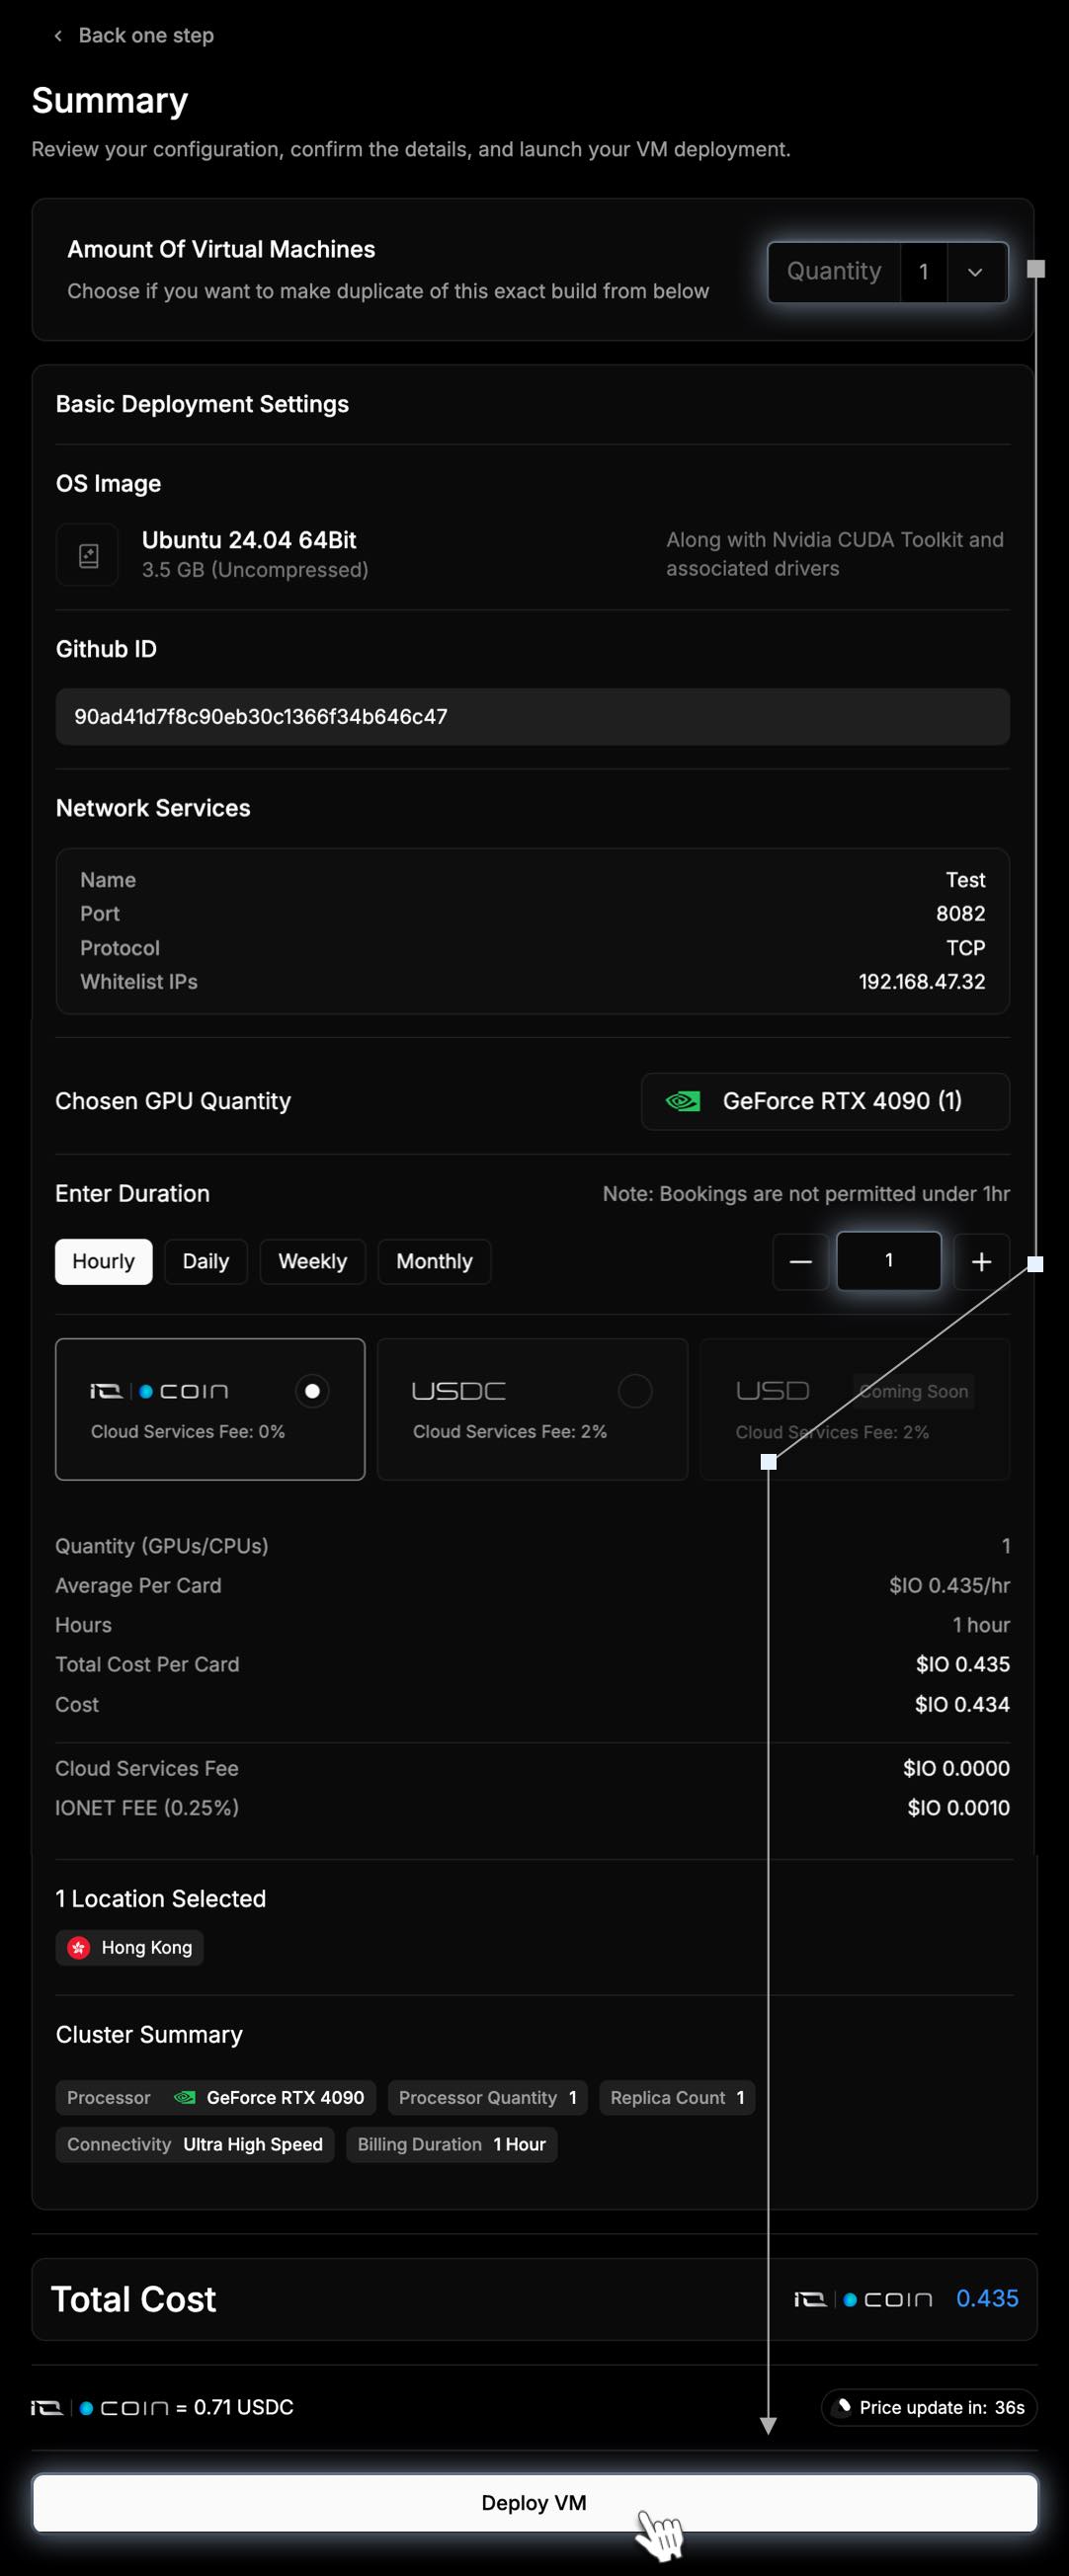
6. Review Summary & Deploy
In the final screen, double-check and customize:
- Container Count
- GPU/CPU Quantity
- Runtime Duration - hourly, daily, or weekly (in hours)
- Payment Method - select your preferred option from IO Coin, USDC, USD
At the bottom, you’ll see your total estimated cost. When ready, click Deploy VM button - your VM will now begin provisioning.
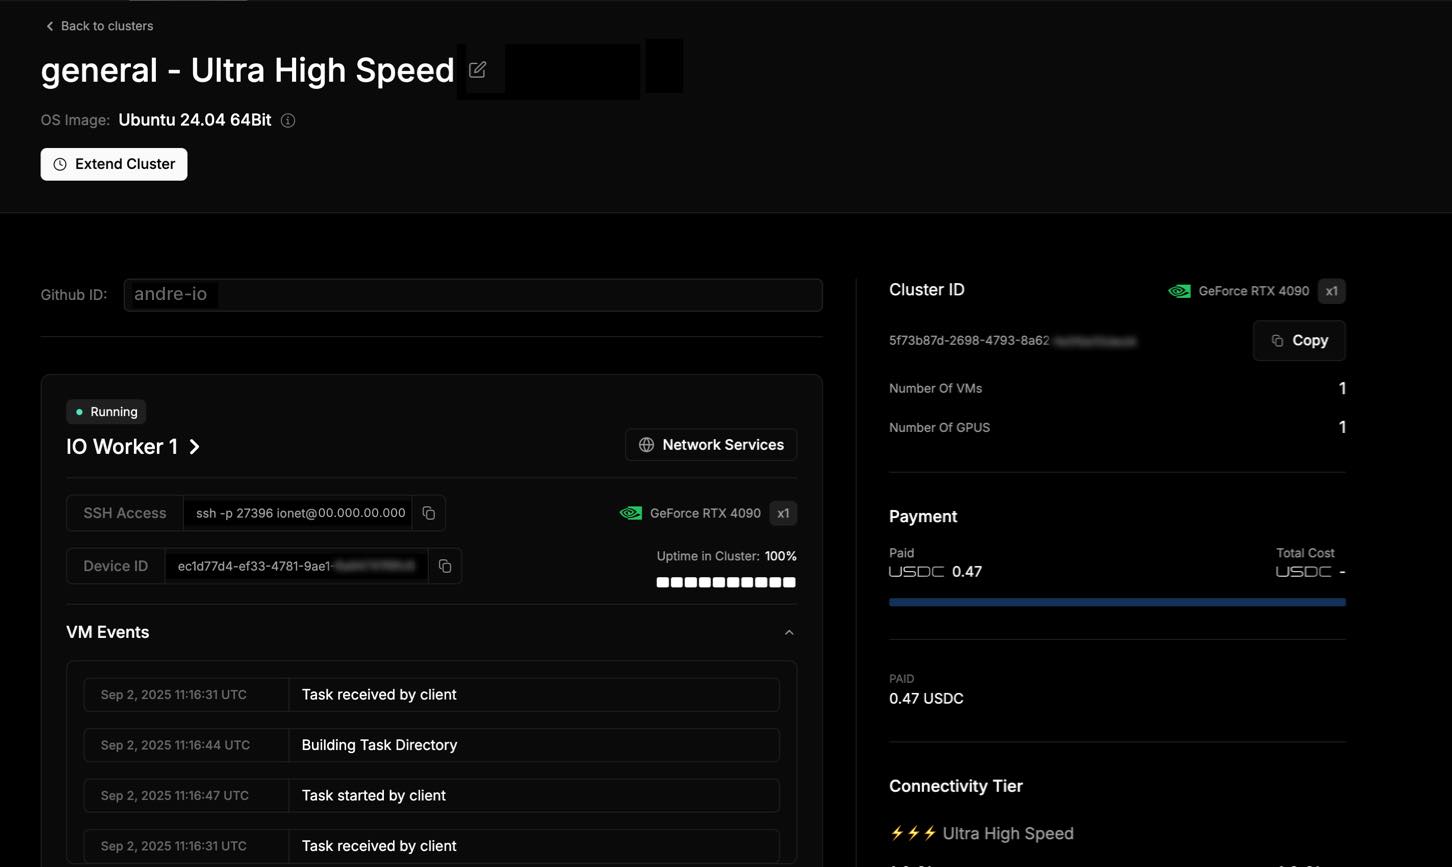
View Your Cluster
Once payment is processed and deployment finishes, you’ll see a live view of your VM cluster.
Click Return to Clusters to monitor usage, pause or resume machines, or launch another VM.
Each cluster detail page gives you:
- Real-time resource usage
- SSH connection info
- Lifecycle controls (pause/resume/terminate)
- Billing insights
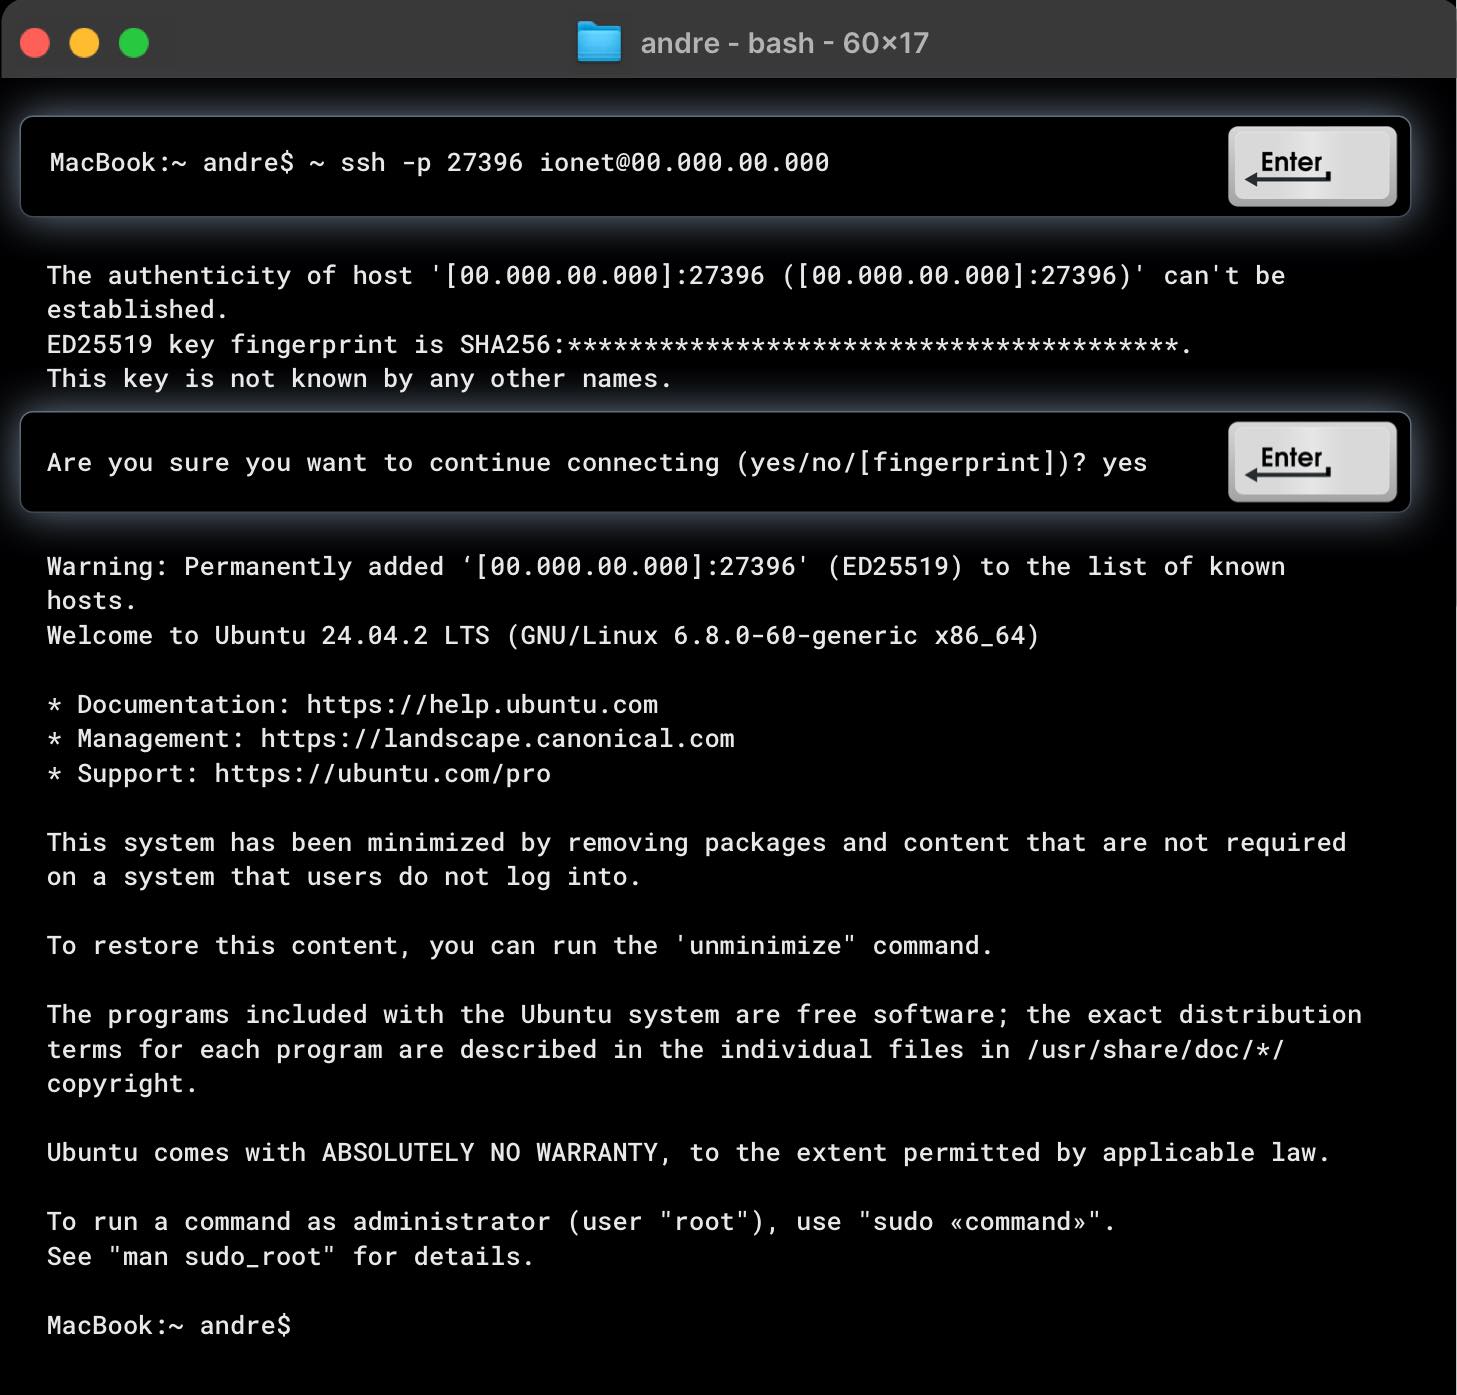
To start working with your VM:
-
Find the SSH Access line on your VM Cluster page and copy it.

-
Open your Terminal and paste the SSH command, then press Enter.
-
You’ll be asked to confirm the connection - type yes and press Enter.
-
Once connected, you’ll see the welcome message and be ready to use your VM through the SSH terminal.
Updated 15 days ago