
The Virtual Machine as a Service (VMaaS) API lets you programmatically deploy and manage virtual machines on the IO Cloud. Unlike CaaS (Containers as a Service), VMaaS provides full VM instances with CPU, GPU, memory, and storage resources — ideal for long-running workloads, custom environments, or GPU-intensive tasks.
Generate an API key
You can obtain an API key for IO Cloud to use VMaaS in two ways:
- Via the web interface
- By using a two-step process (first generate a JWT token, then request the API key using curl)
Option 1: Generate an API Key via Web Interface
IO Clouds APIs authenticate requests using API keys. You can generate API keys from your user account.
Note: When generating an API key, make sure to specify the associated IO Cloud project.
Always treat your API key as a secret! Do not share it or expose it in client-side code (e.g., browsers or mobile apps). Instead, store it securely in an environment variable or a key management service on your backend server.
Option 2: Generate an API Key Using a JWT Token
Step 1. Get a JWT Token
IO's API is built around RESTful principles. You can use IO's APIs to gain insights into different elements of our network.
To use IO's APIs, you must supply a JWT token in the header of your request. Follow the instructions below to generate a token:
- Go to IO.net > IO ID > IO Clouds tab.
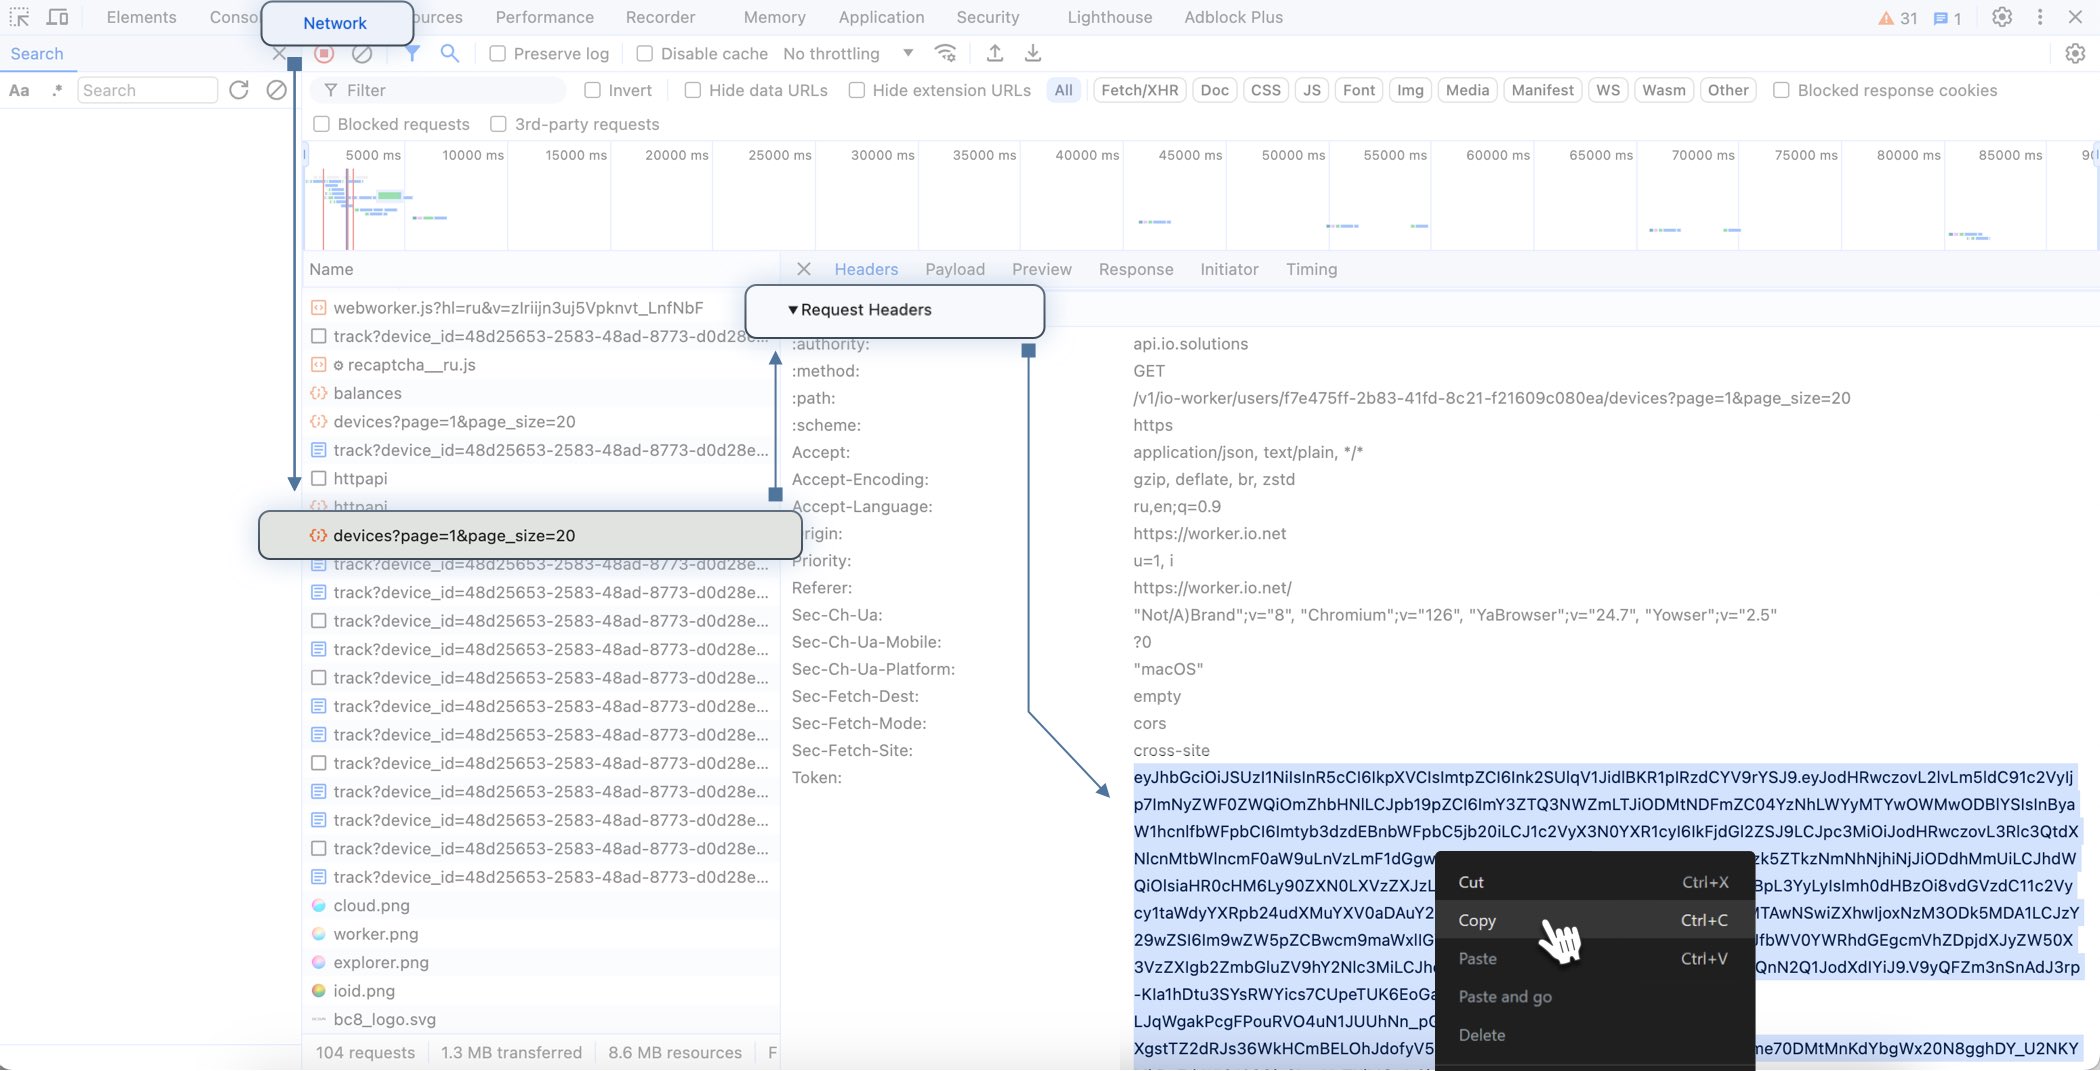
- In the UI, right-click and select Inspect.
- In the Inspect tool, click Network.
- Refresh the IO Clouds page.
- In the list of elements, click Devices.
- Scroll down to the Request Headers section.
- Copy and store the token.
The token is valid for 21 days.
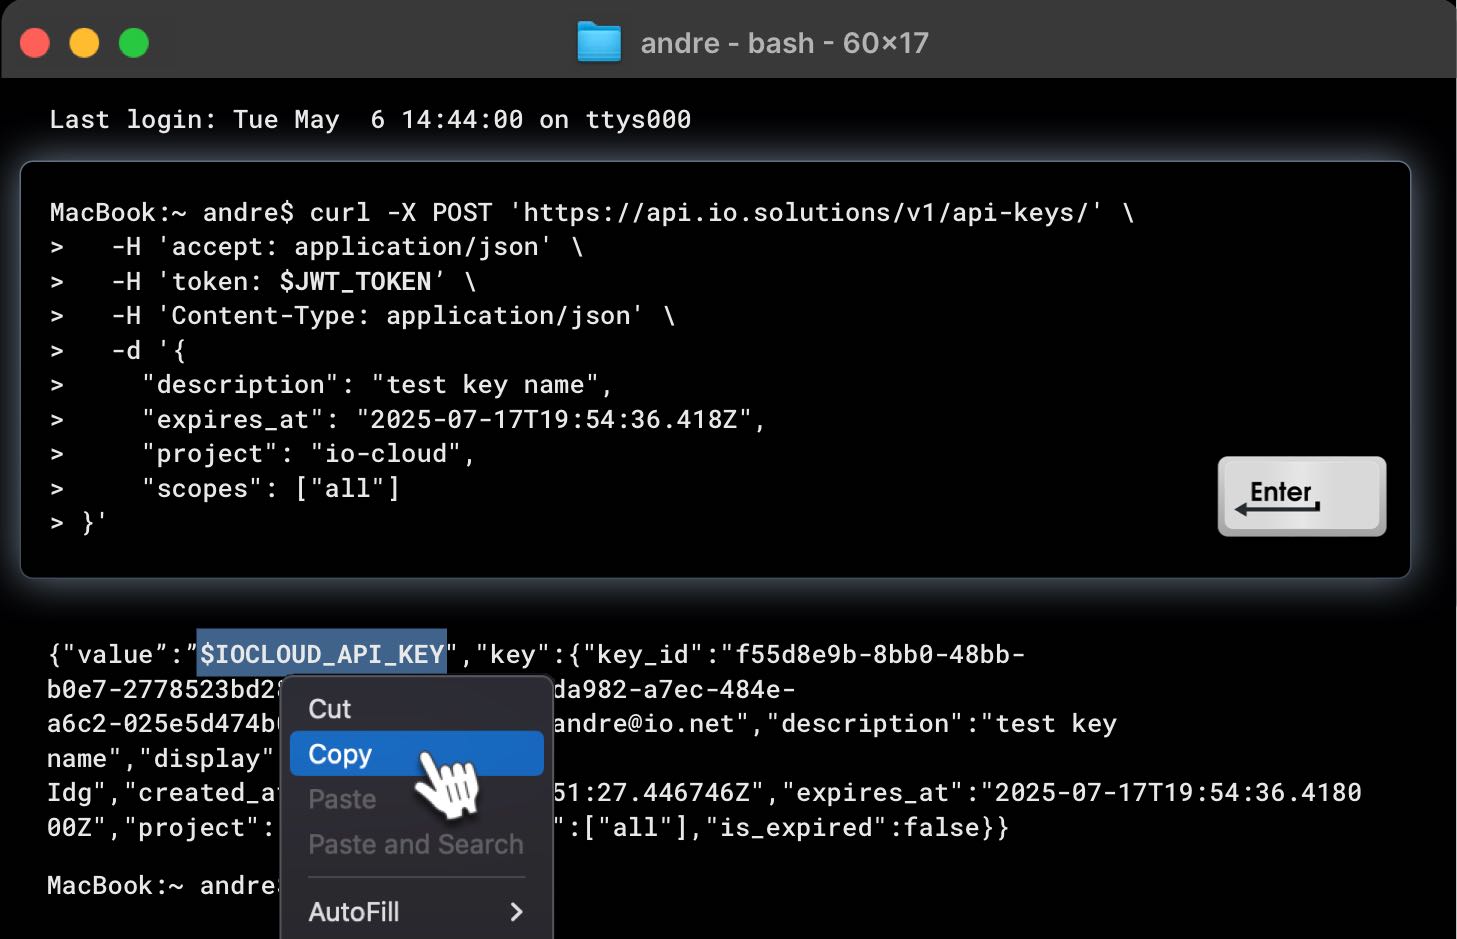
Step 2. Generate an API Key via curl
curlUse the JWT token to request your API key:
curl -X POST 'https://api.io.solutions/v1/api-keys/' \
  -H 'accept: application/json' \
  -H 'token: $JWT_TOKEN' \
  -H 'Content-Type: application/json' \
  -d '{
    "description": "API Key Name",
    "expires_at": "2025-07-17T19:54:36.418Z",
    "project": "io-cloud",
    "scopes": ["all"]
}'
Use the returned key with the X-API-KEY header in your requests.
Always treat your API key as a secret! Do not share it or expose it in client-side code (e.g., browsers or mobile apps). Instead, store it securely in an environment variable or a key management service on your backend server.
Making requests
Note: Accessing APIs requires IO credits. Please make sure to request IO credits before using any API endpoints. Contact support or visit the IO Credits Request Page for more details.
Include the API key in an Authorization HTTP header for all API requests:
Authorization: X-API-KEY $IOCLOUD_API_KEY
Replace $IOCLOUD_API_KEY with your actual API key.
Example: Deploy VMs
The following curl command demonstrates how to deploy VMs in IO Cloud.
Make sure to include your x-api-key header and, if needed, adjust the query parameters such as status, page, or page_size.:
curl -X POST "https://api.io.solutions/enterprise/v1/io-cloud/vmaas/deploy?page=0&page_size=10&status=running" \
  -H "accept: application/json" \
  -H "Content-Type: application/json" \
  -H "x-api-key: YOUR_API_KEY_HERE" \
  -d '{
    "name": "test-deployment",
    "hardware_quantity": 2,
    "hardware_name": "NVIDIA A100",
    "region": "us-east-1"
  }'
This request should return a response like this:
{
  "data": {
    "deployments": [
      {
        "id": "3fa85f64-5717-4562-b3fc-2c963f66afa6",
        "status": "running",
        "name": "test-deployment",
        "completed_percent": 75,
        "hardware_quantity": 2,
        "brand_name": "NVIDIA",
        "hardware_name": "A100",
        "compute_minutes_served": 120,
        "compute_minutes_remaining": 240
      }
    ],
    "total": 1,
    "statuses": ["running"]
  }
}